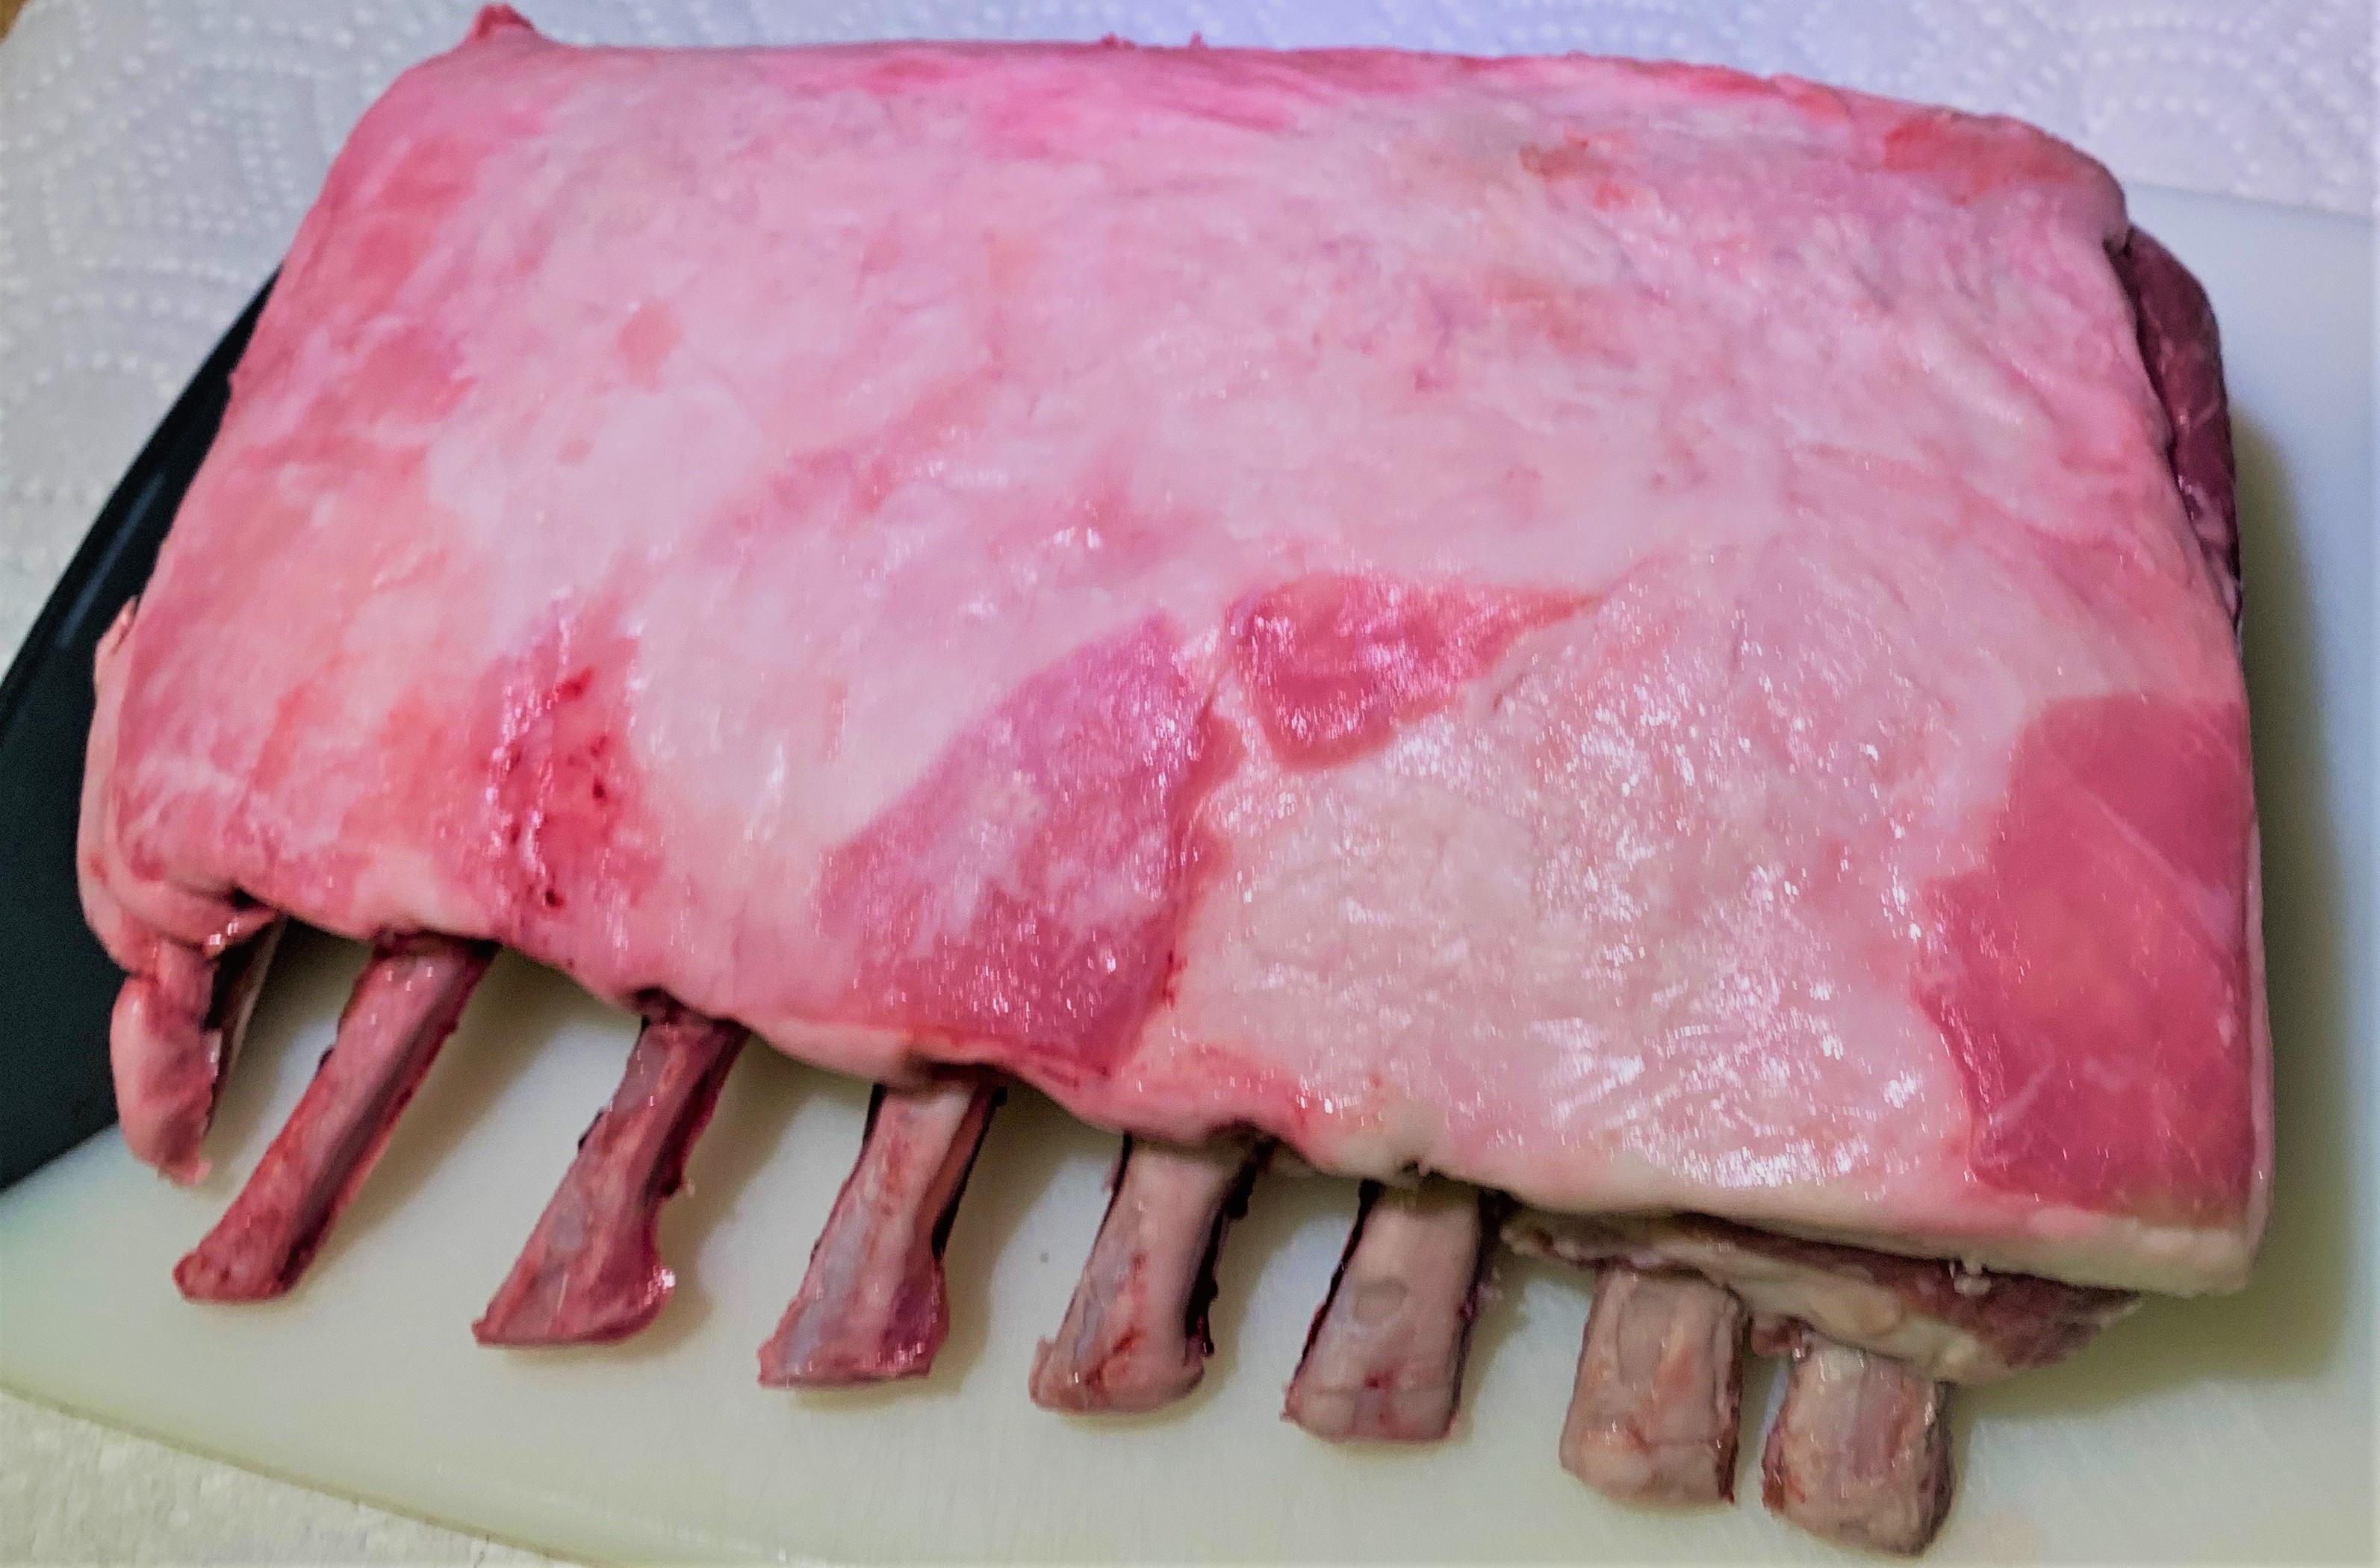
If you’re attempting a dish like the Blue Bayou Restaurant’s Herb Crusted Rack of Lamb, you’ll most likely need to clean your lamb rack. Yes, most that you can buy will come “frenched” but the extent of this can vary from store to store, rack to rack. You will almost certainly have more work to do. This can be a bit of a tedious process but the end result is elegant and well worth the time. So, I thought I’d share the process of trimming (aka frenching) a rack of lamb.

Step 1
Find the level on the rack where the bones reach the tenderloin. As seen in the picture above, cut into the fat cap and peel away the excess fat. The result should look similar to the photo below.

You will still need to do some cleaning of the bones but this gets you started.
Step 2
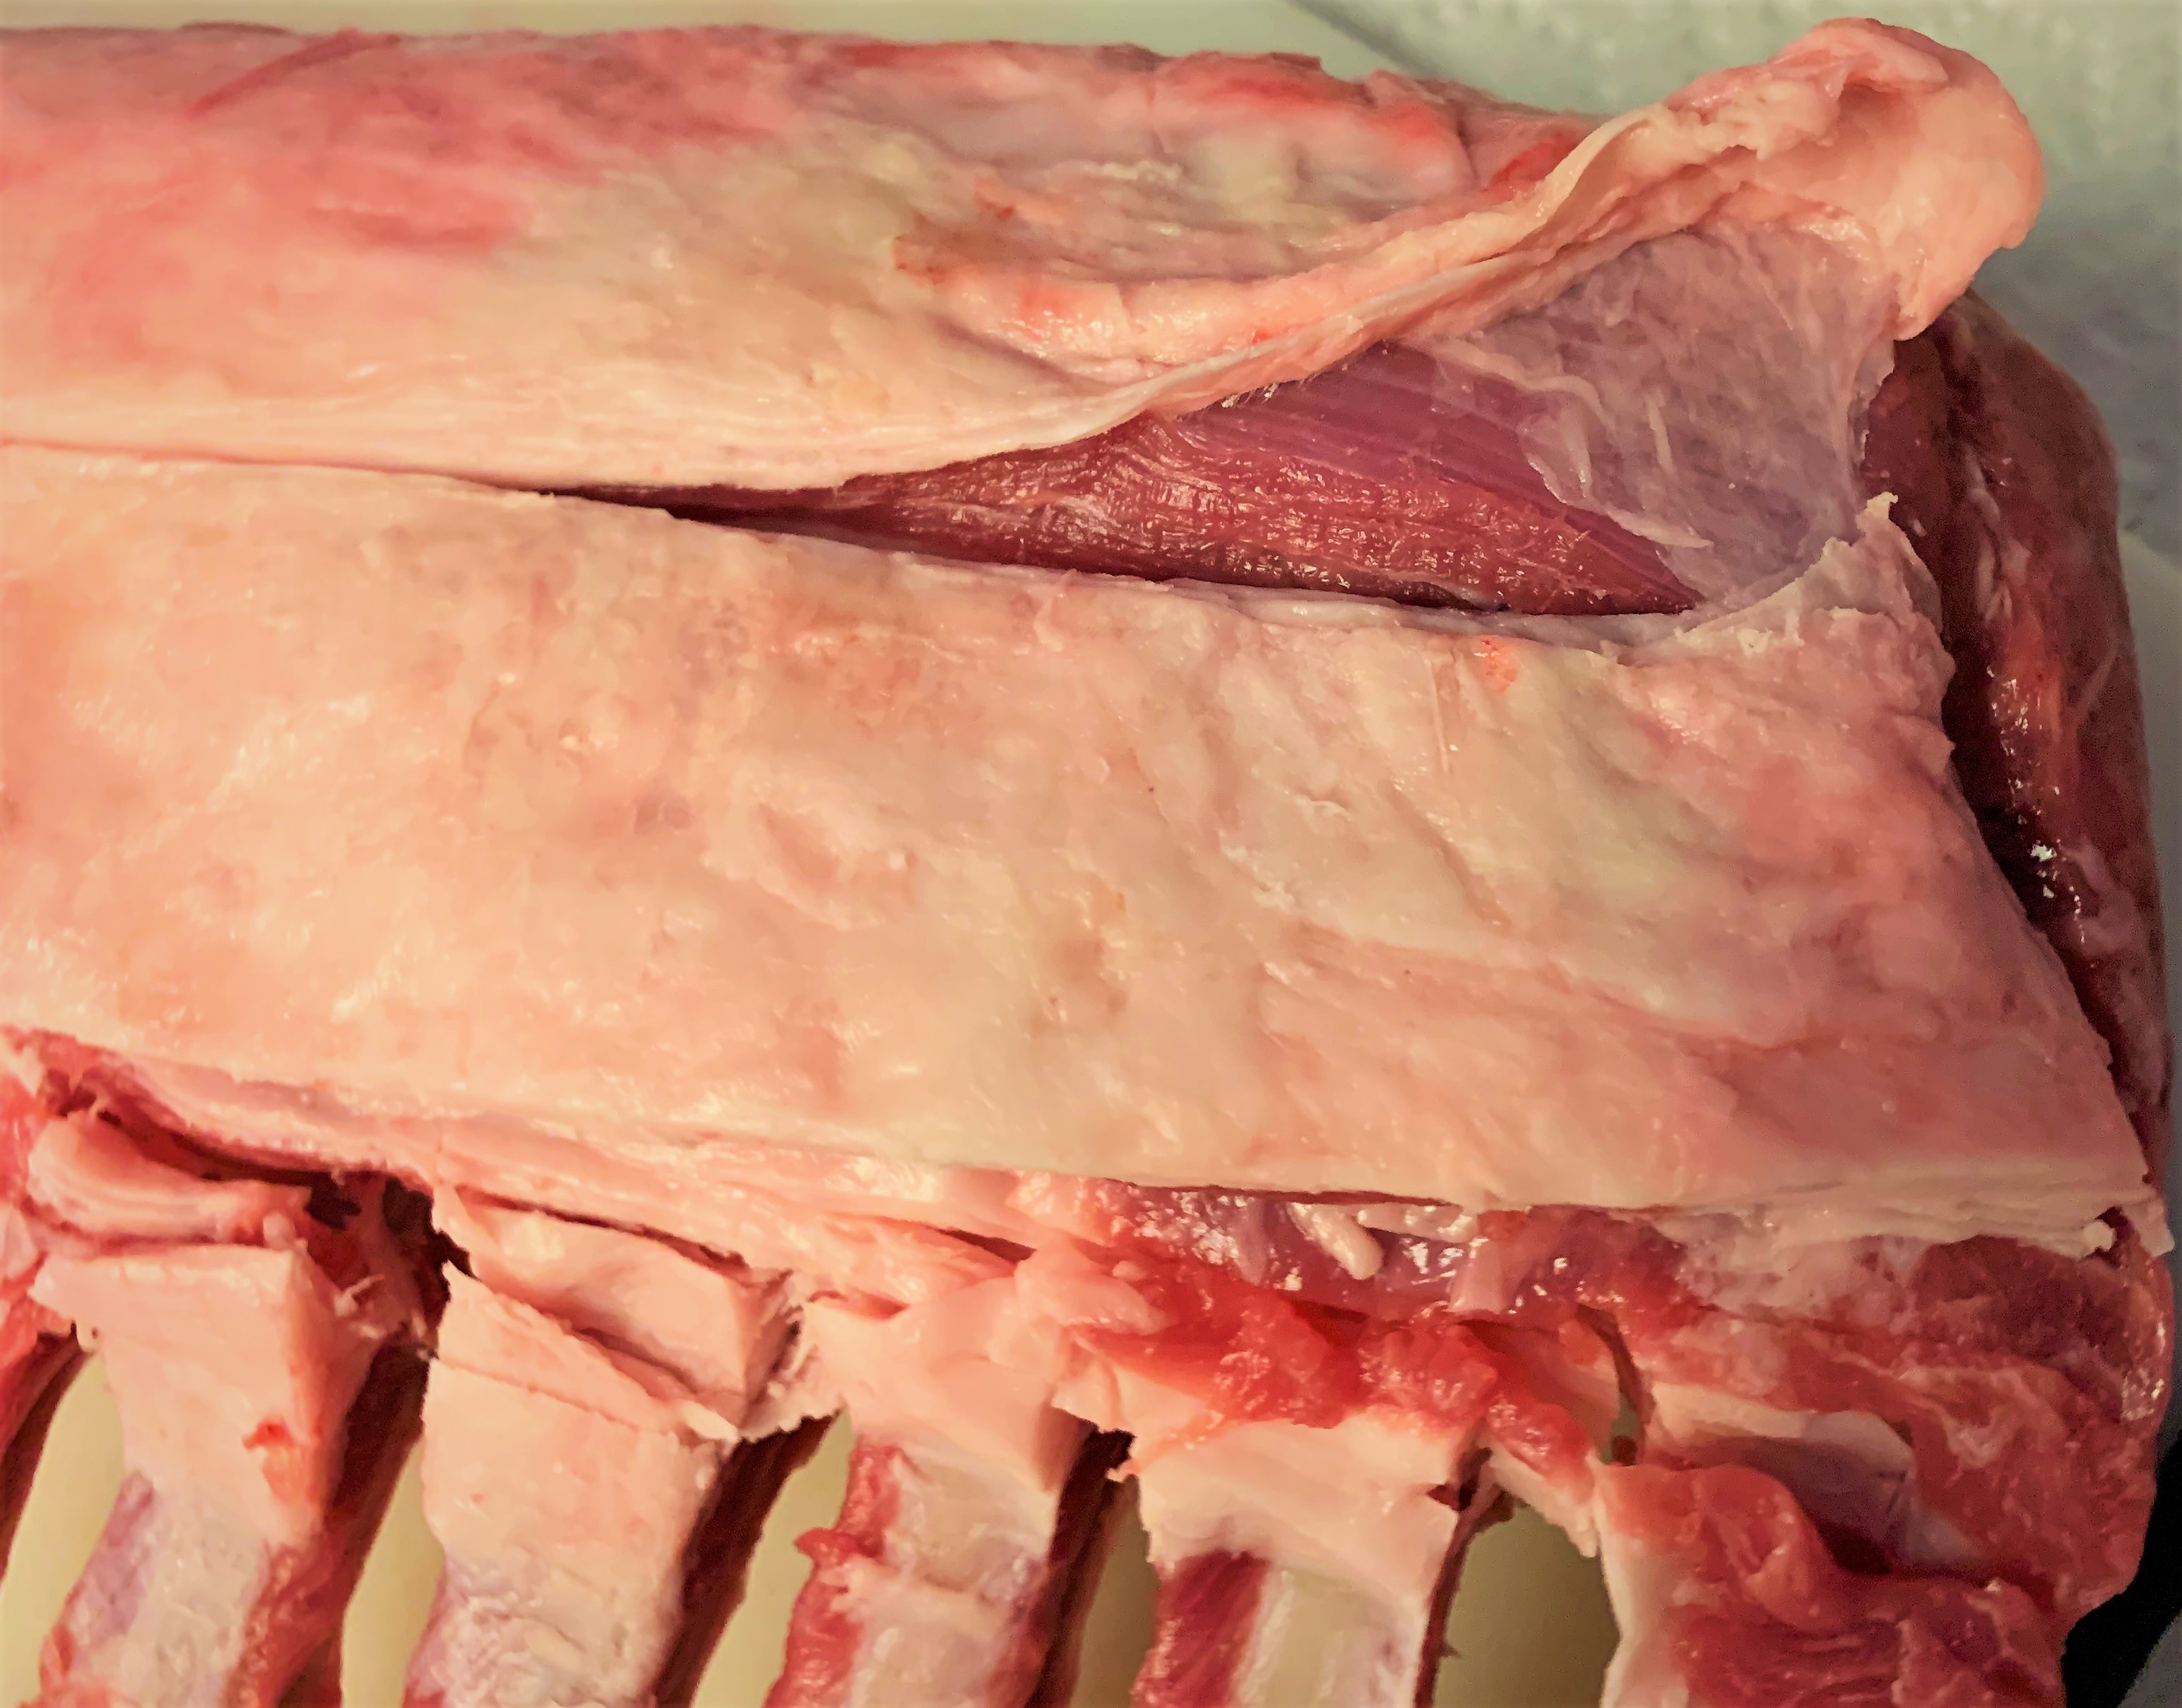
Next you’ll want to, carefully, trim the rest of the fat cap from the tenderloin. Find a spot on the fat cap a couple of inches above the bones. Using a sharp knife, cut a line into the fat cap across the rack. Be careful not to cut into it too deeply so you can save as much of the delicious meat as possible.
Then gently peel the fat cap from the tenderloin. It should come off somewhat easily but you will still probably need to do some gentle trimming with a knife to help remove the cap.
Once the cap is removed from the tenderloin, gently clean any silver-skin or fat that remains. The result should leave only the ruby red meat showing around the top end of the rack.
Step 3
The next steps are the ones that take the longest but provide the best look for your rack of lamb.
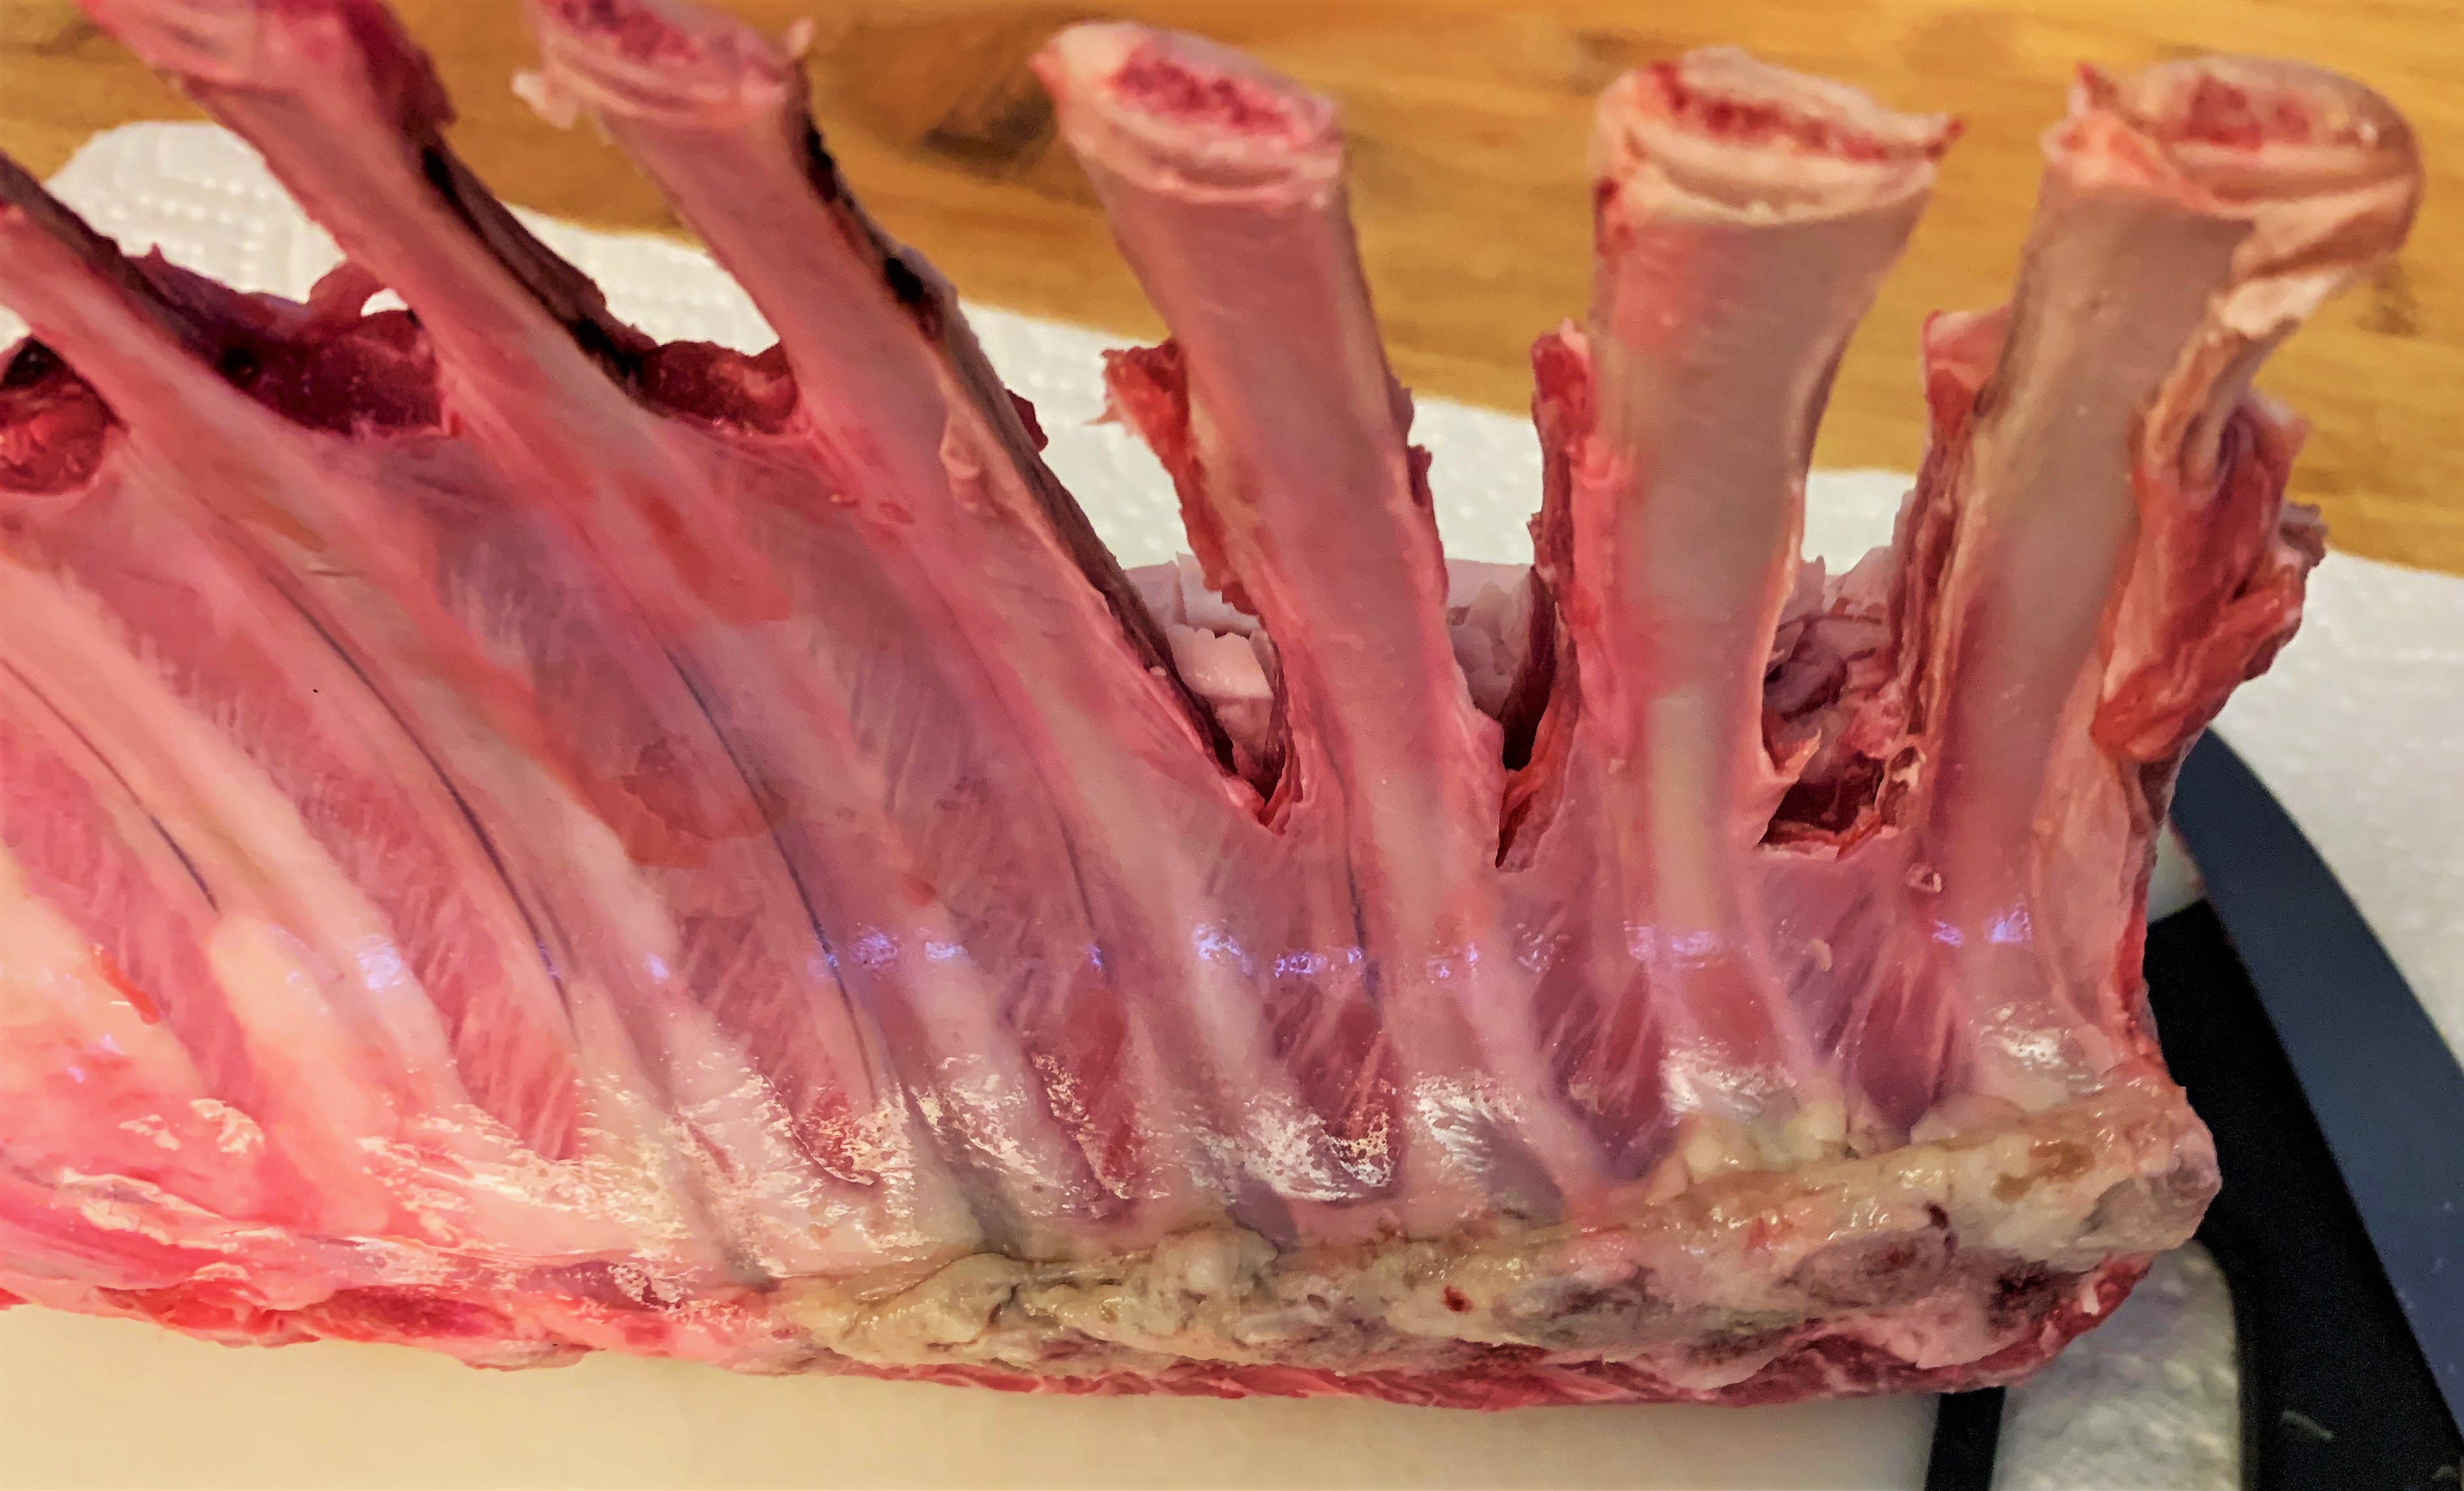
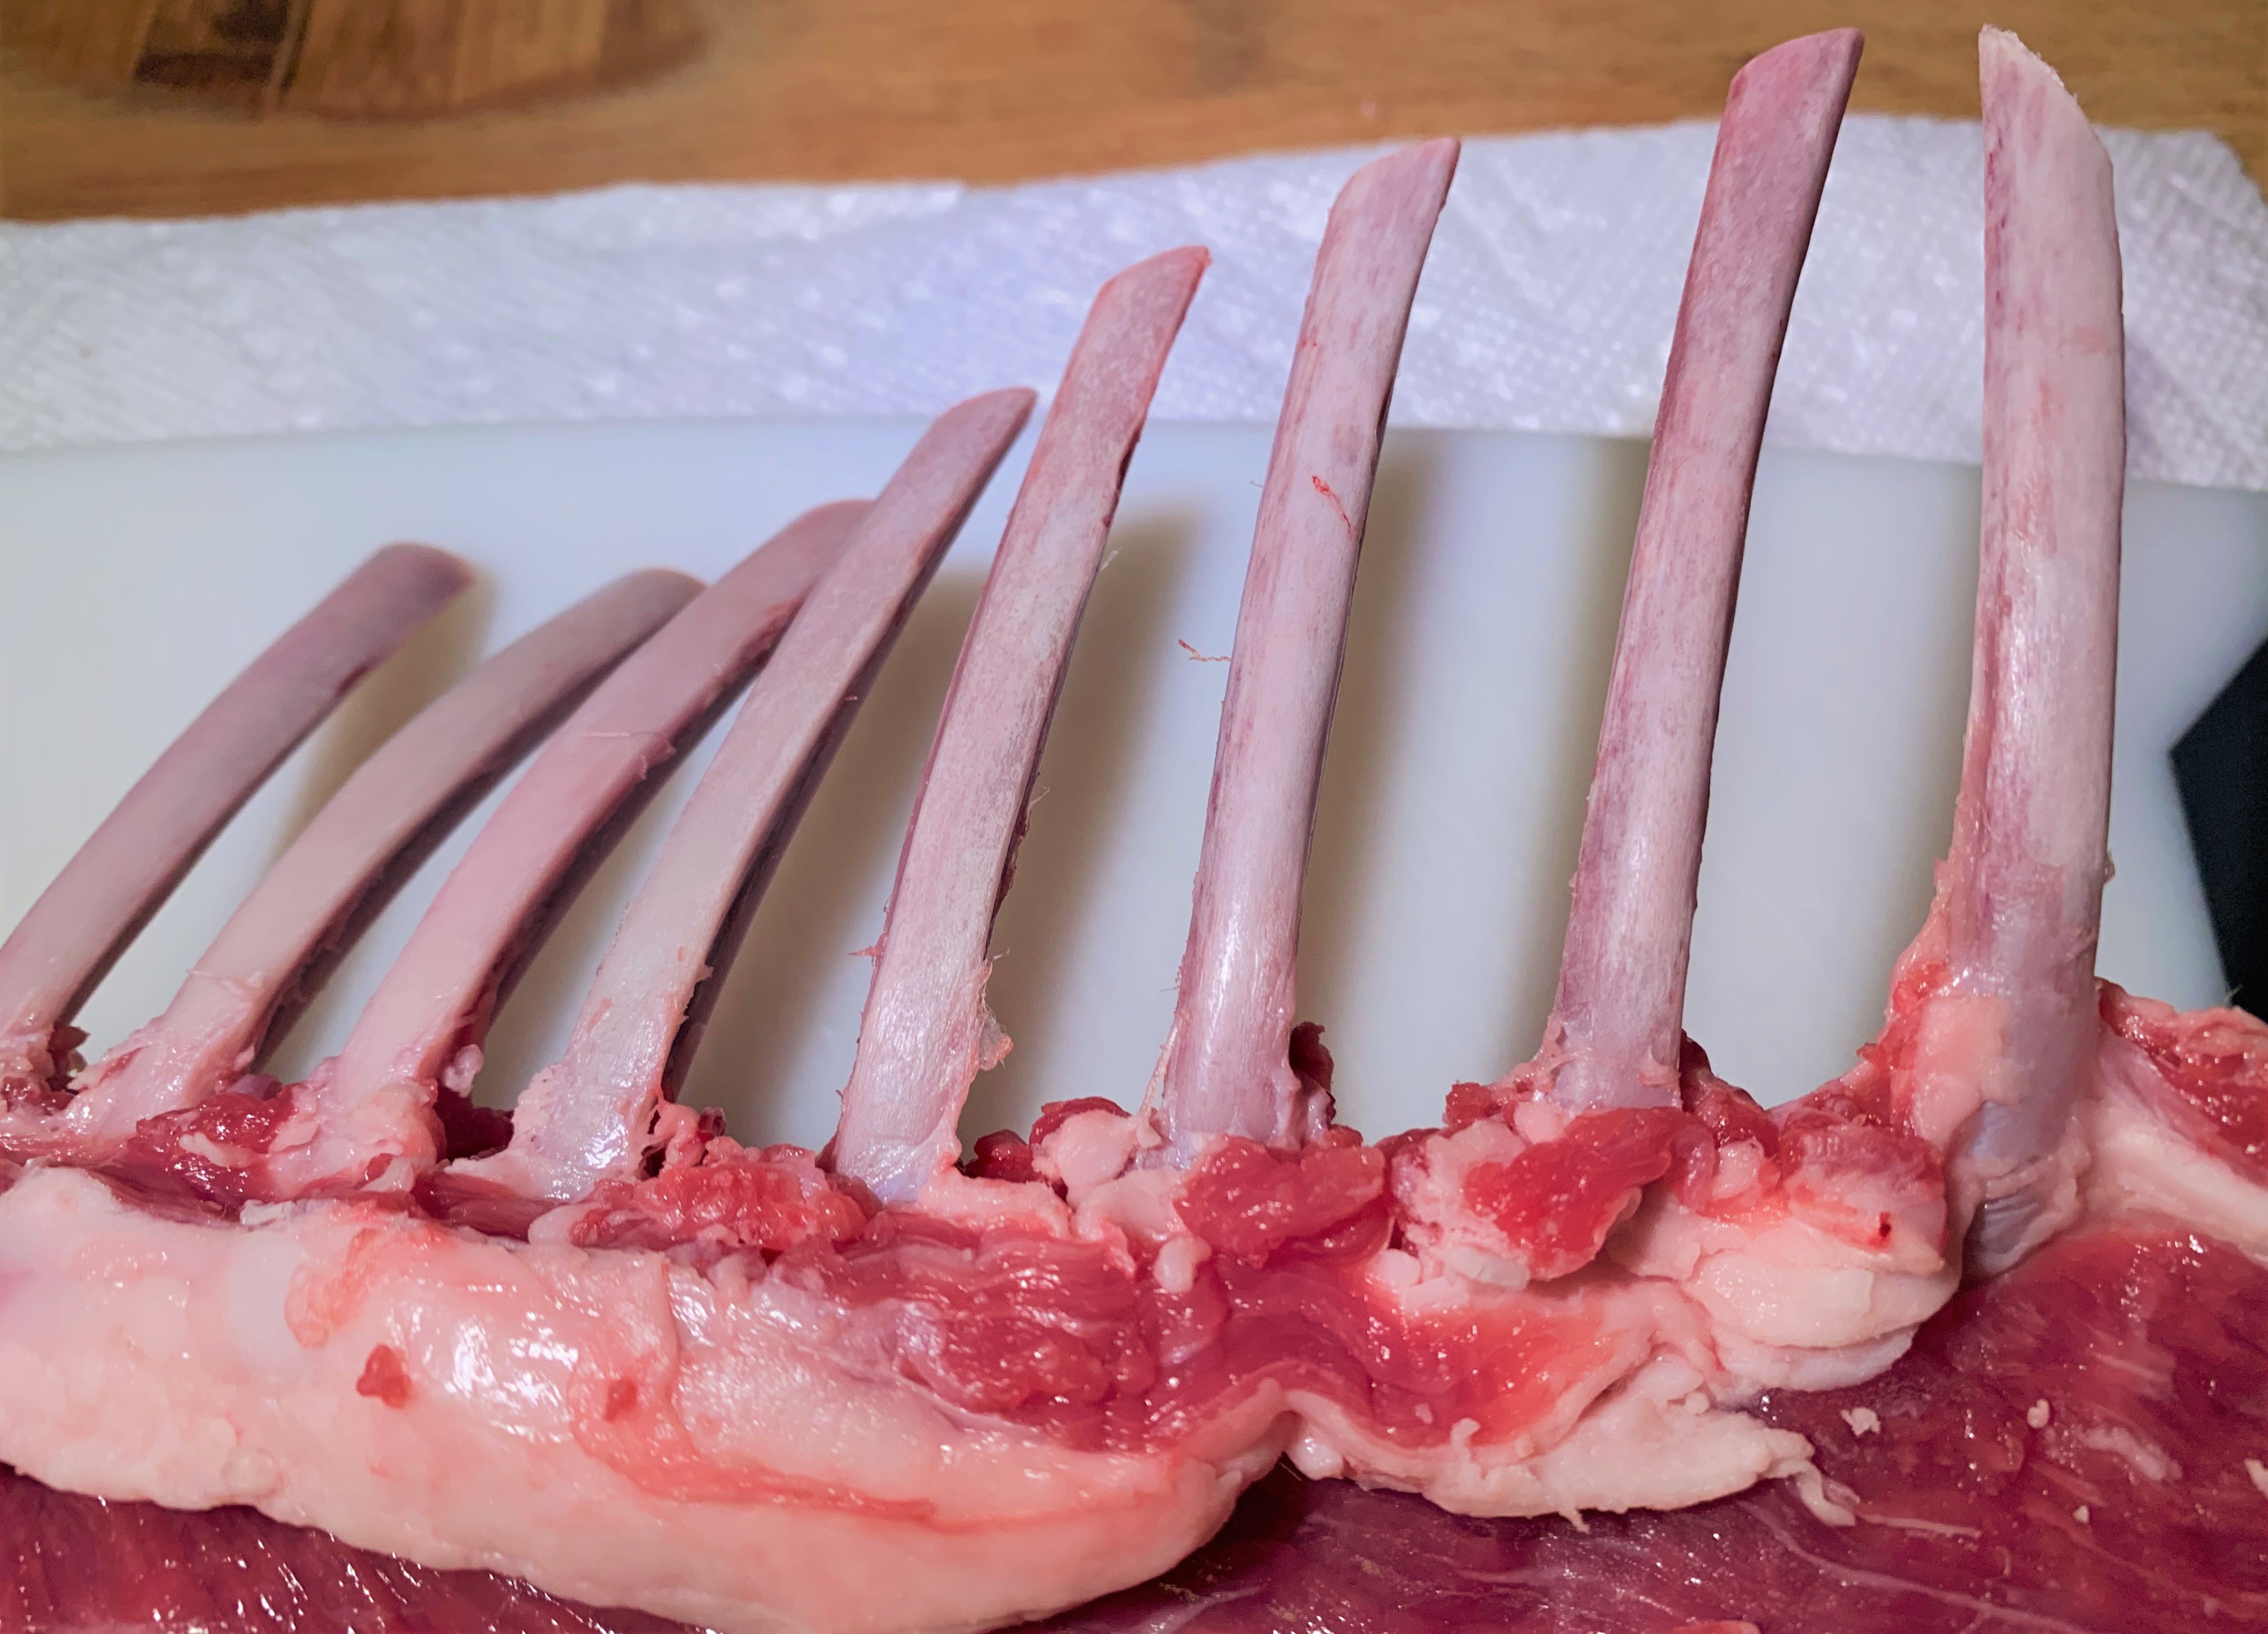
Return to the bone side of the rack and trim the fat and connective tissue the is between the ribs. Using a knife, cut between the bones up until you reach the end of the remaining fat cap. See an example in the photo above.
Once you’ve done this between each of the ribs you’ll want to work to clean the bones as much as possible. This will keep the extra tissue from burning on the bones giving it a much more pristine and elegant appearance.
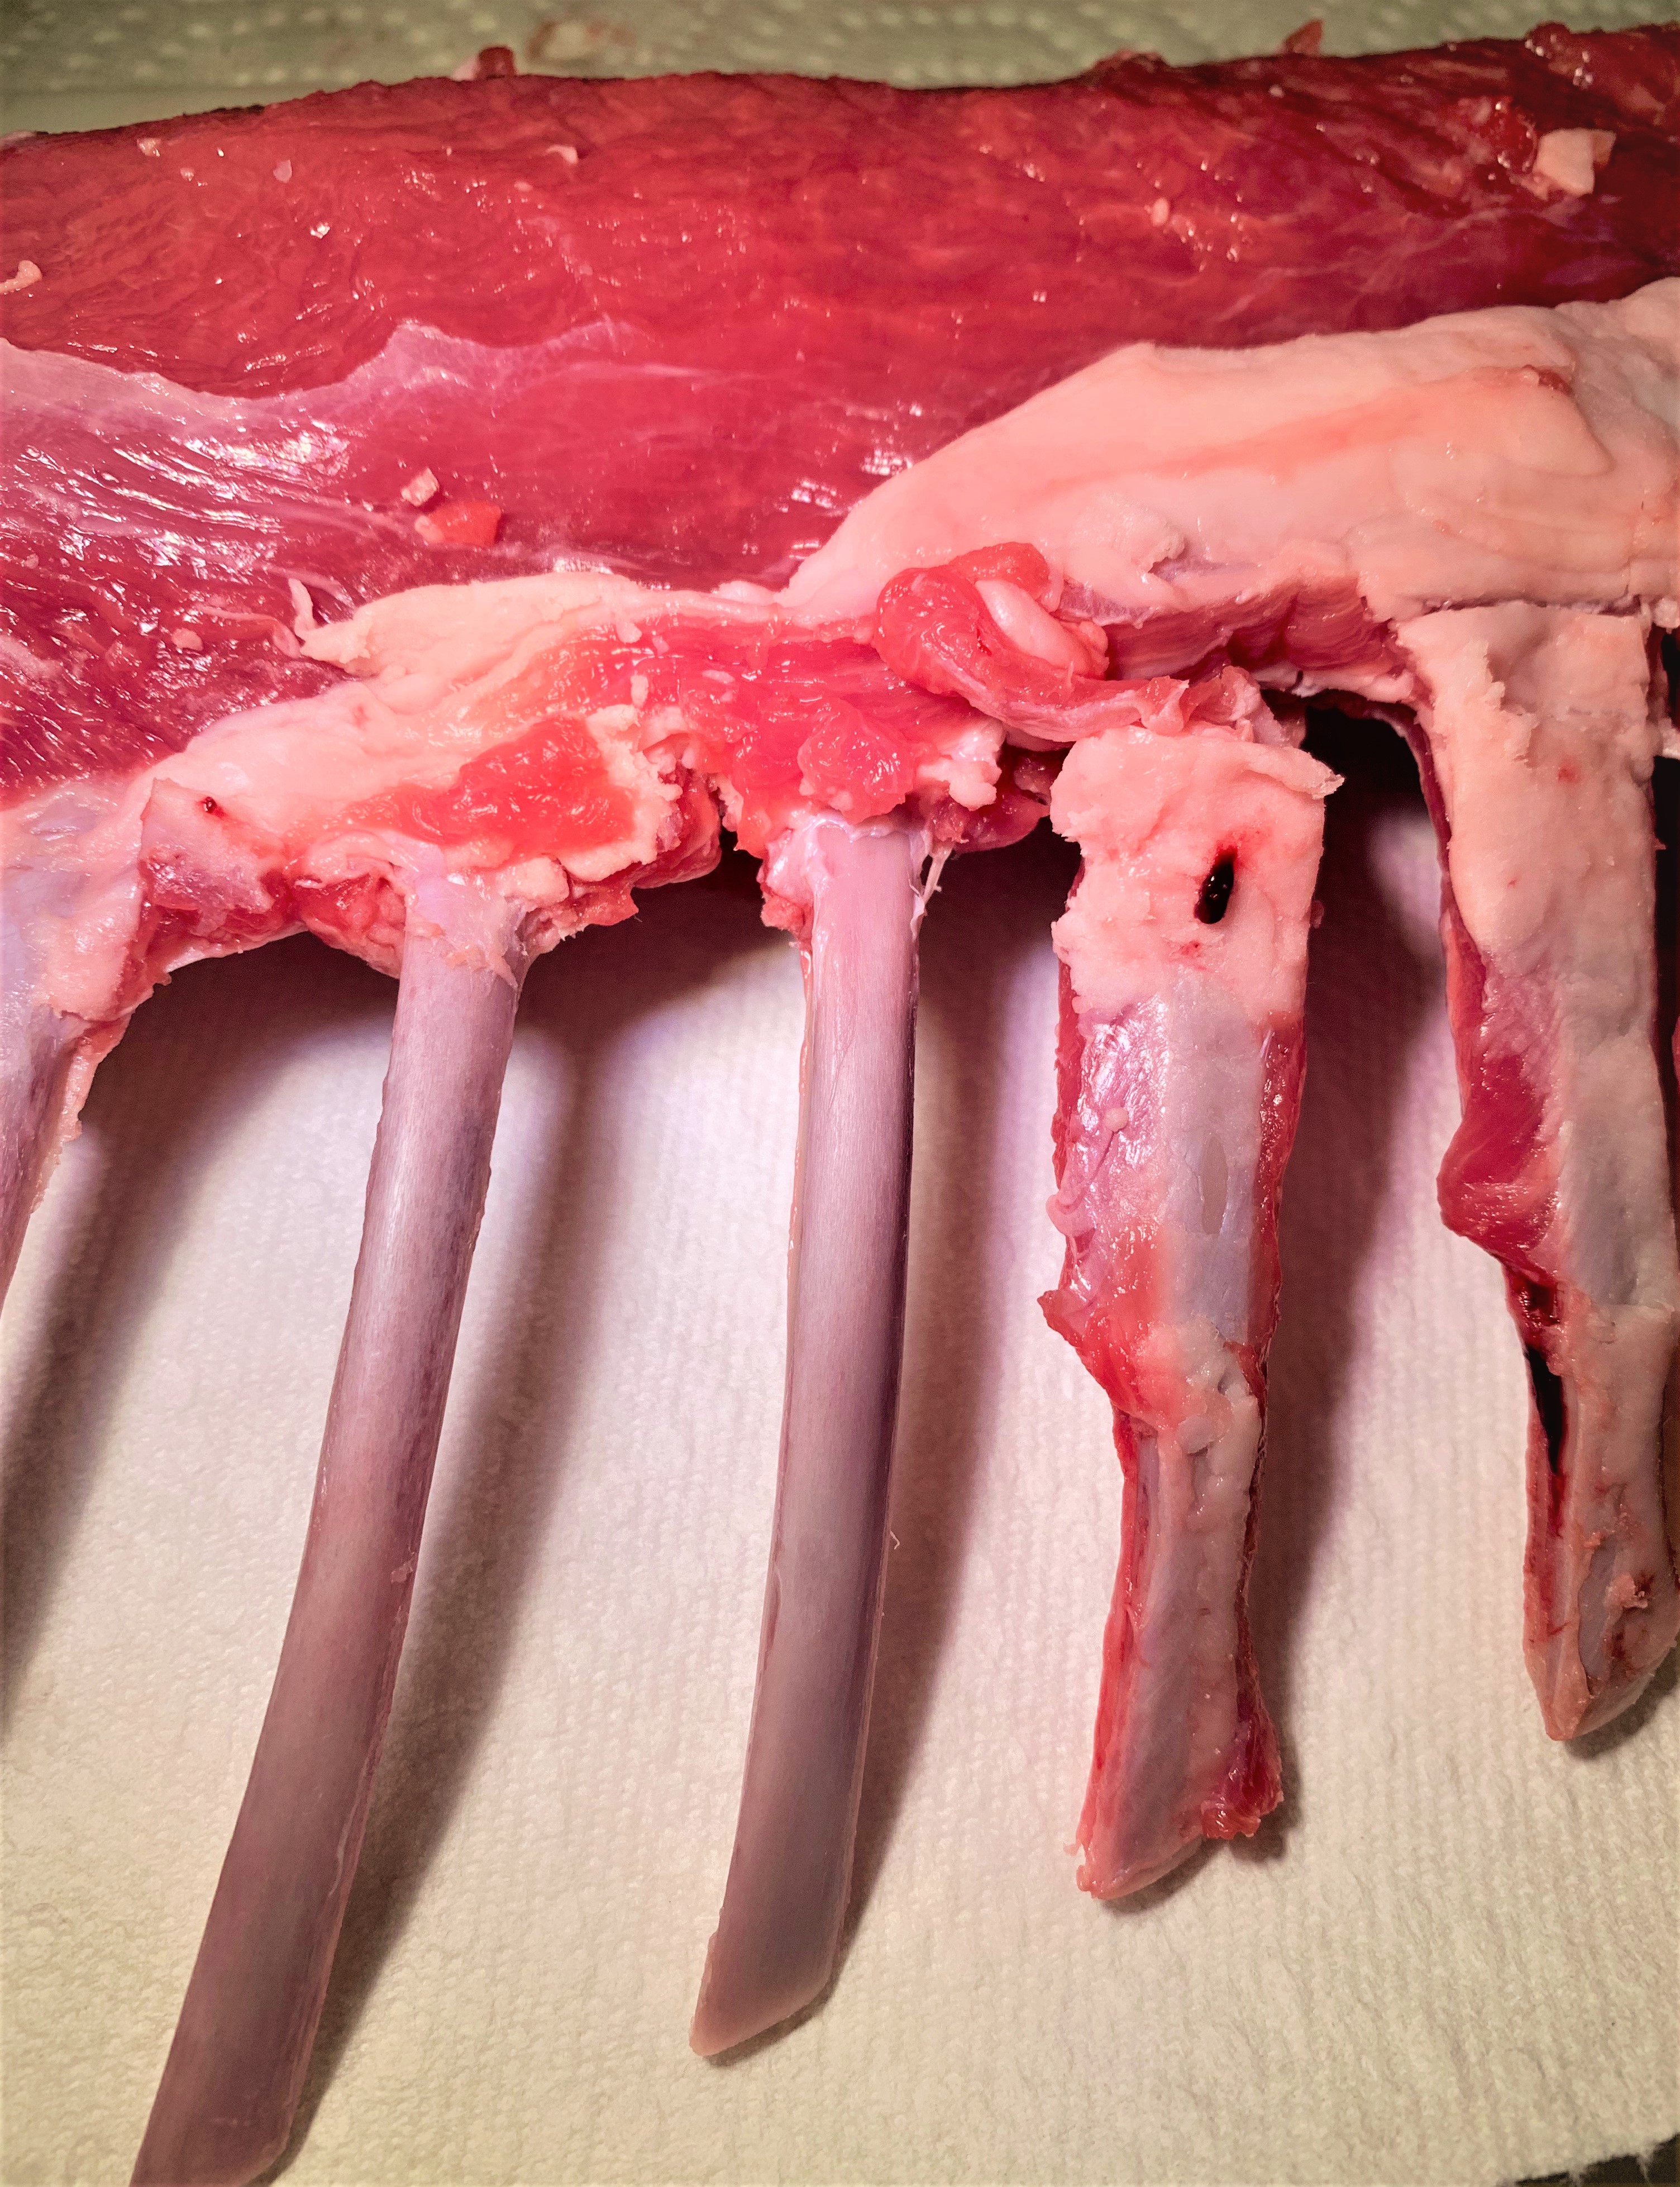
Using the side of your knife, gently scrape the fat and sinew that is attached to each of the ribs. This is a delicate process so be careful with your knife so as to not accidentally cut yourself. You can also use your hands and/or a towel to peel away the unwanted stuff from the bones. You can see the difference between the cleaned and uncleaned bones in the picture above. The finished rack should look similar to the photo below.
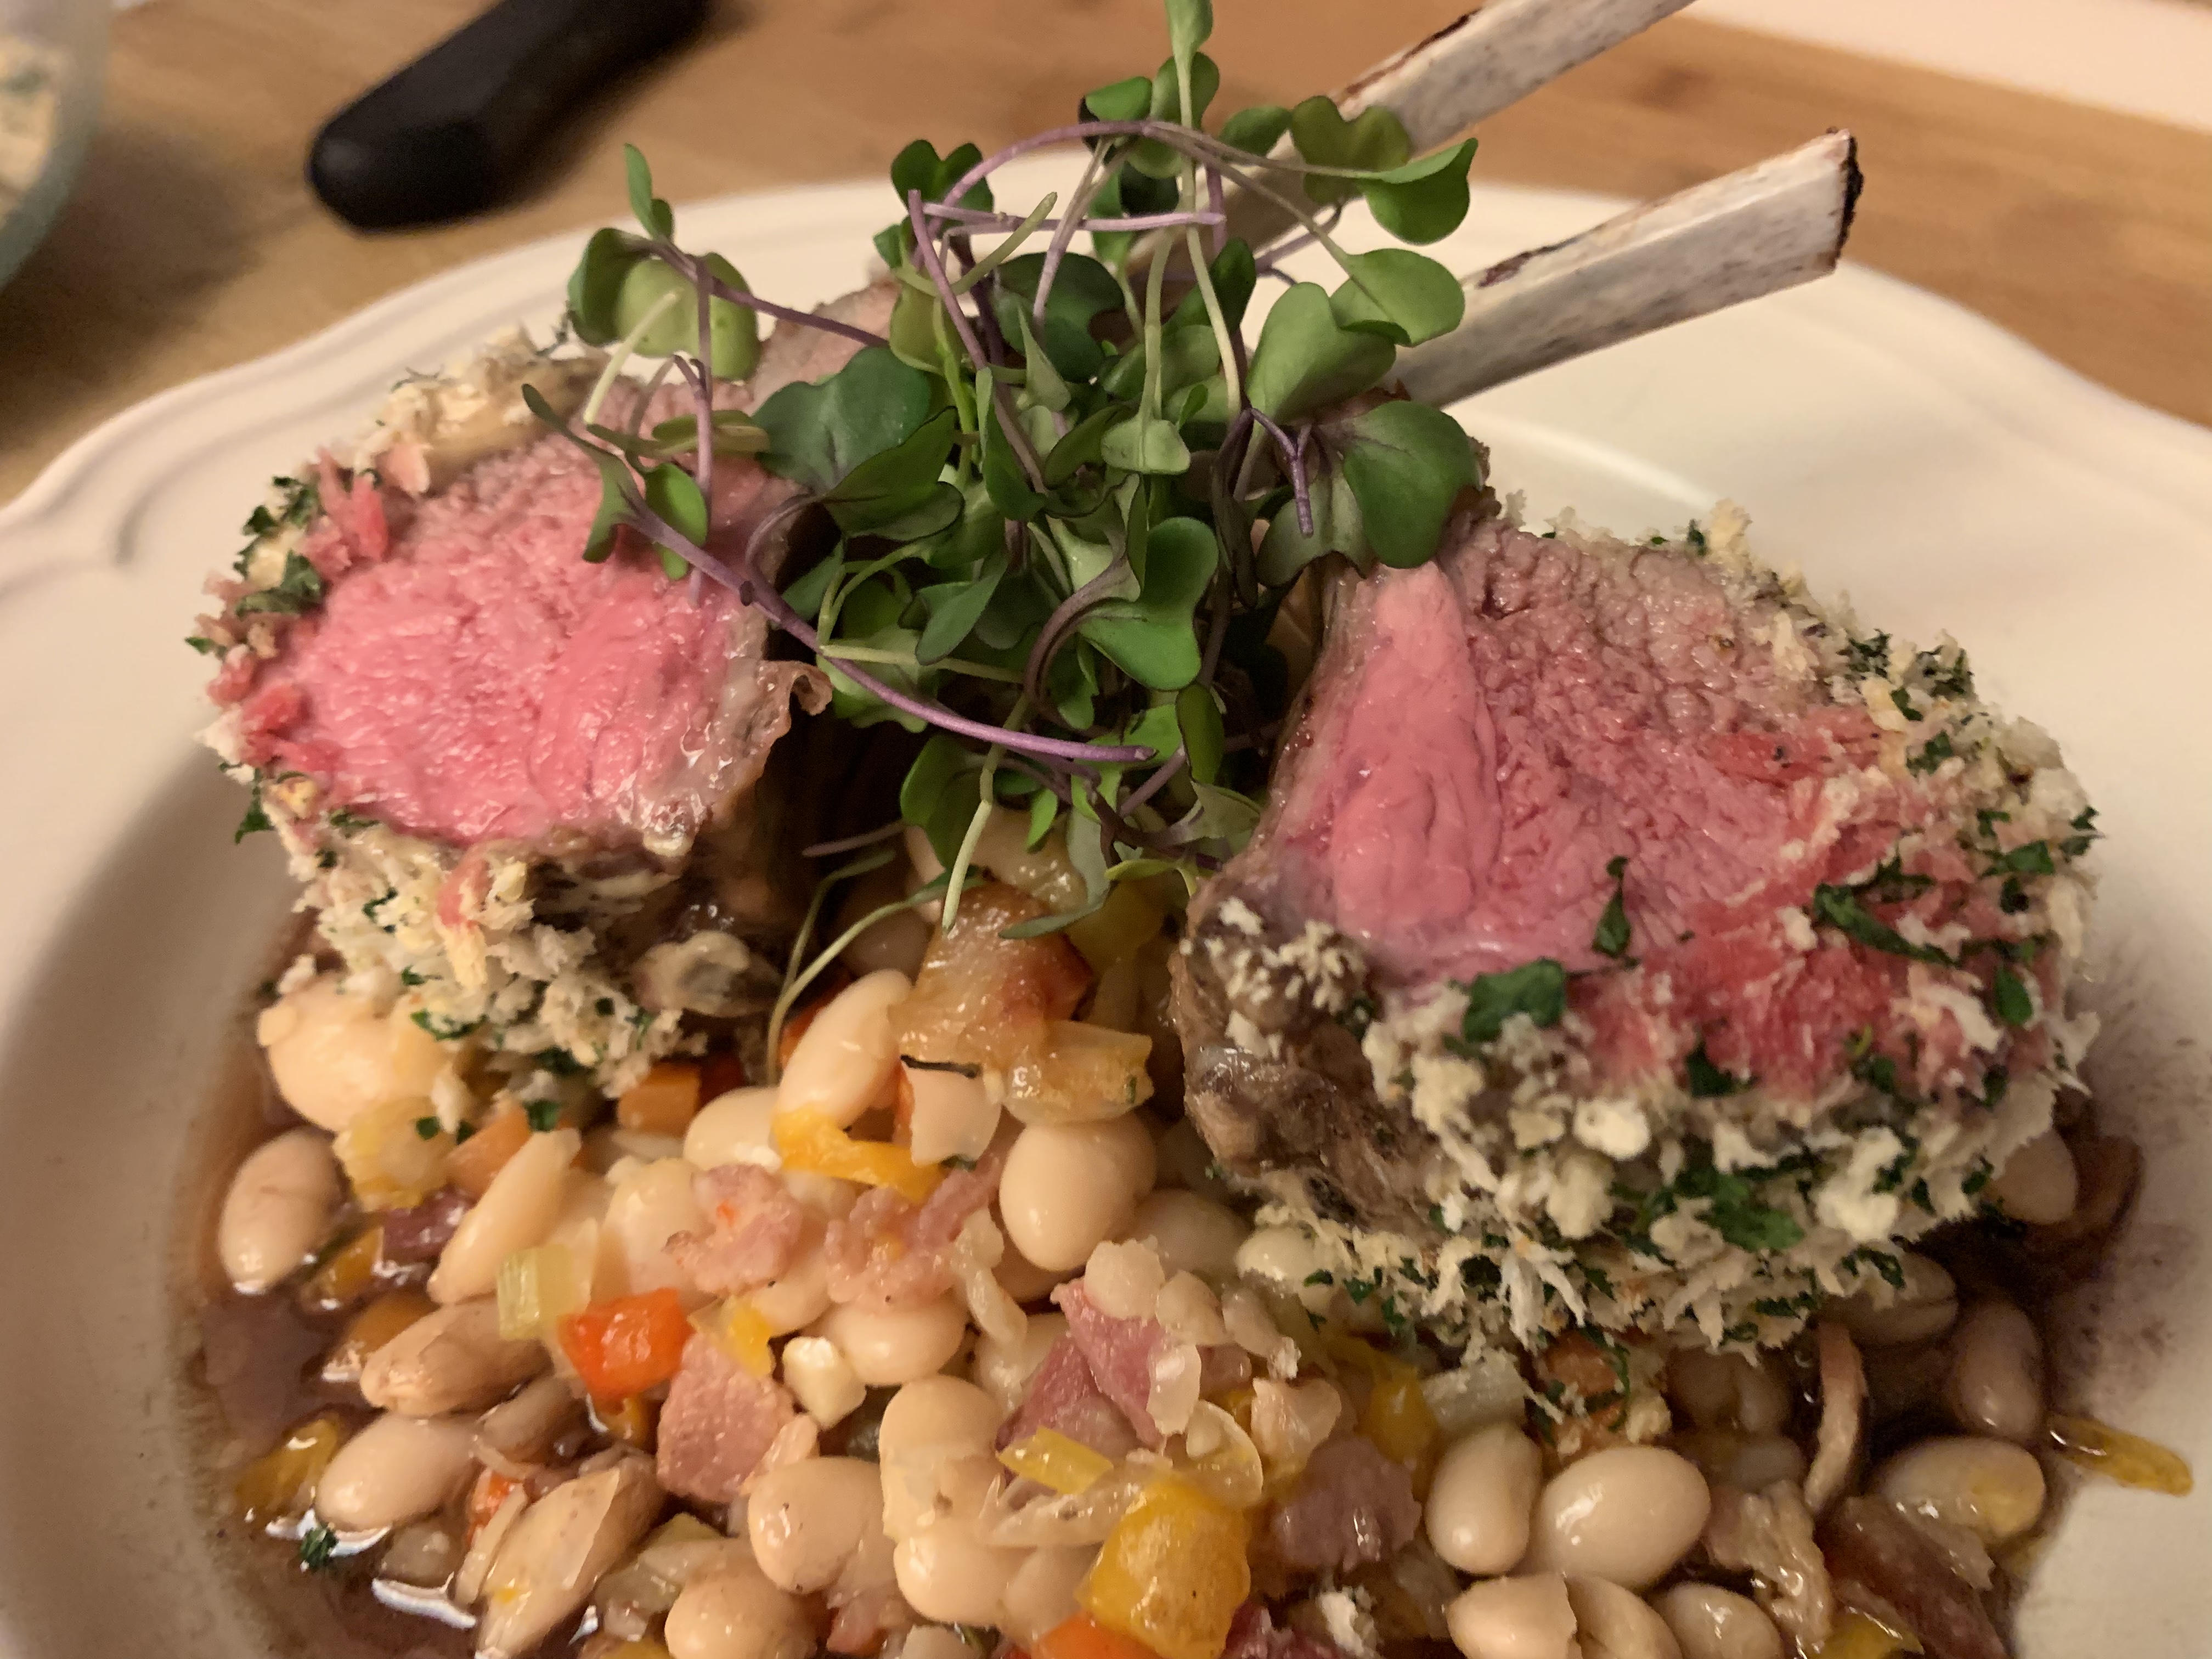
The End Result
As you can see, I work extra hard to get as much of the stuff off of the bones as possible. To be honest, I tend to be a little too much of a perfectionist in this regard. The good news is you don’t need to be as nit picky about it as I am. Just clean as much as you feel comfortable then cover the bones with foil before cooking. That will help keep your lamb rack from having too many blackened spots on the ribs.
I know this process can be a little confusing so please comment or email me if you have and questions. I’m always happy to help you make your next Disney Dish as magical as possible.
Cheers!