
We’re winding down our Disney Dishes journey into all things Pumpkin Spice. However, we’ve saved a couple of our best recipes for last. That includes today’s savory and sweet combination that will, definitely, kick your Fall season into high gear. Yep, here’s our recipe for Pumpkin Mickey Waffles with Oven “Fried” Chicken and Candied Pumpkin Seeds.
One of the best things about this recipe is that all of the elements are fantastic together but they also work very well on there own. The Pumpkin Mickey Waffles are perfect for a weekend breakfast. The Oven “Fried” Chicken is excellent for a mid-week dinner. And the Candied Pumpkin Seeds are really nice for topping salads or just to snack on all by themselves.
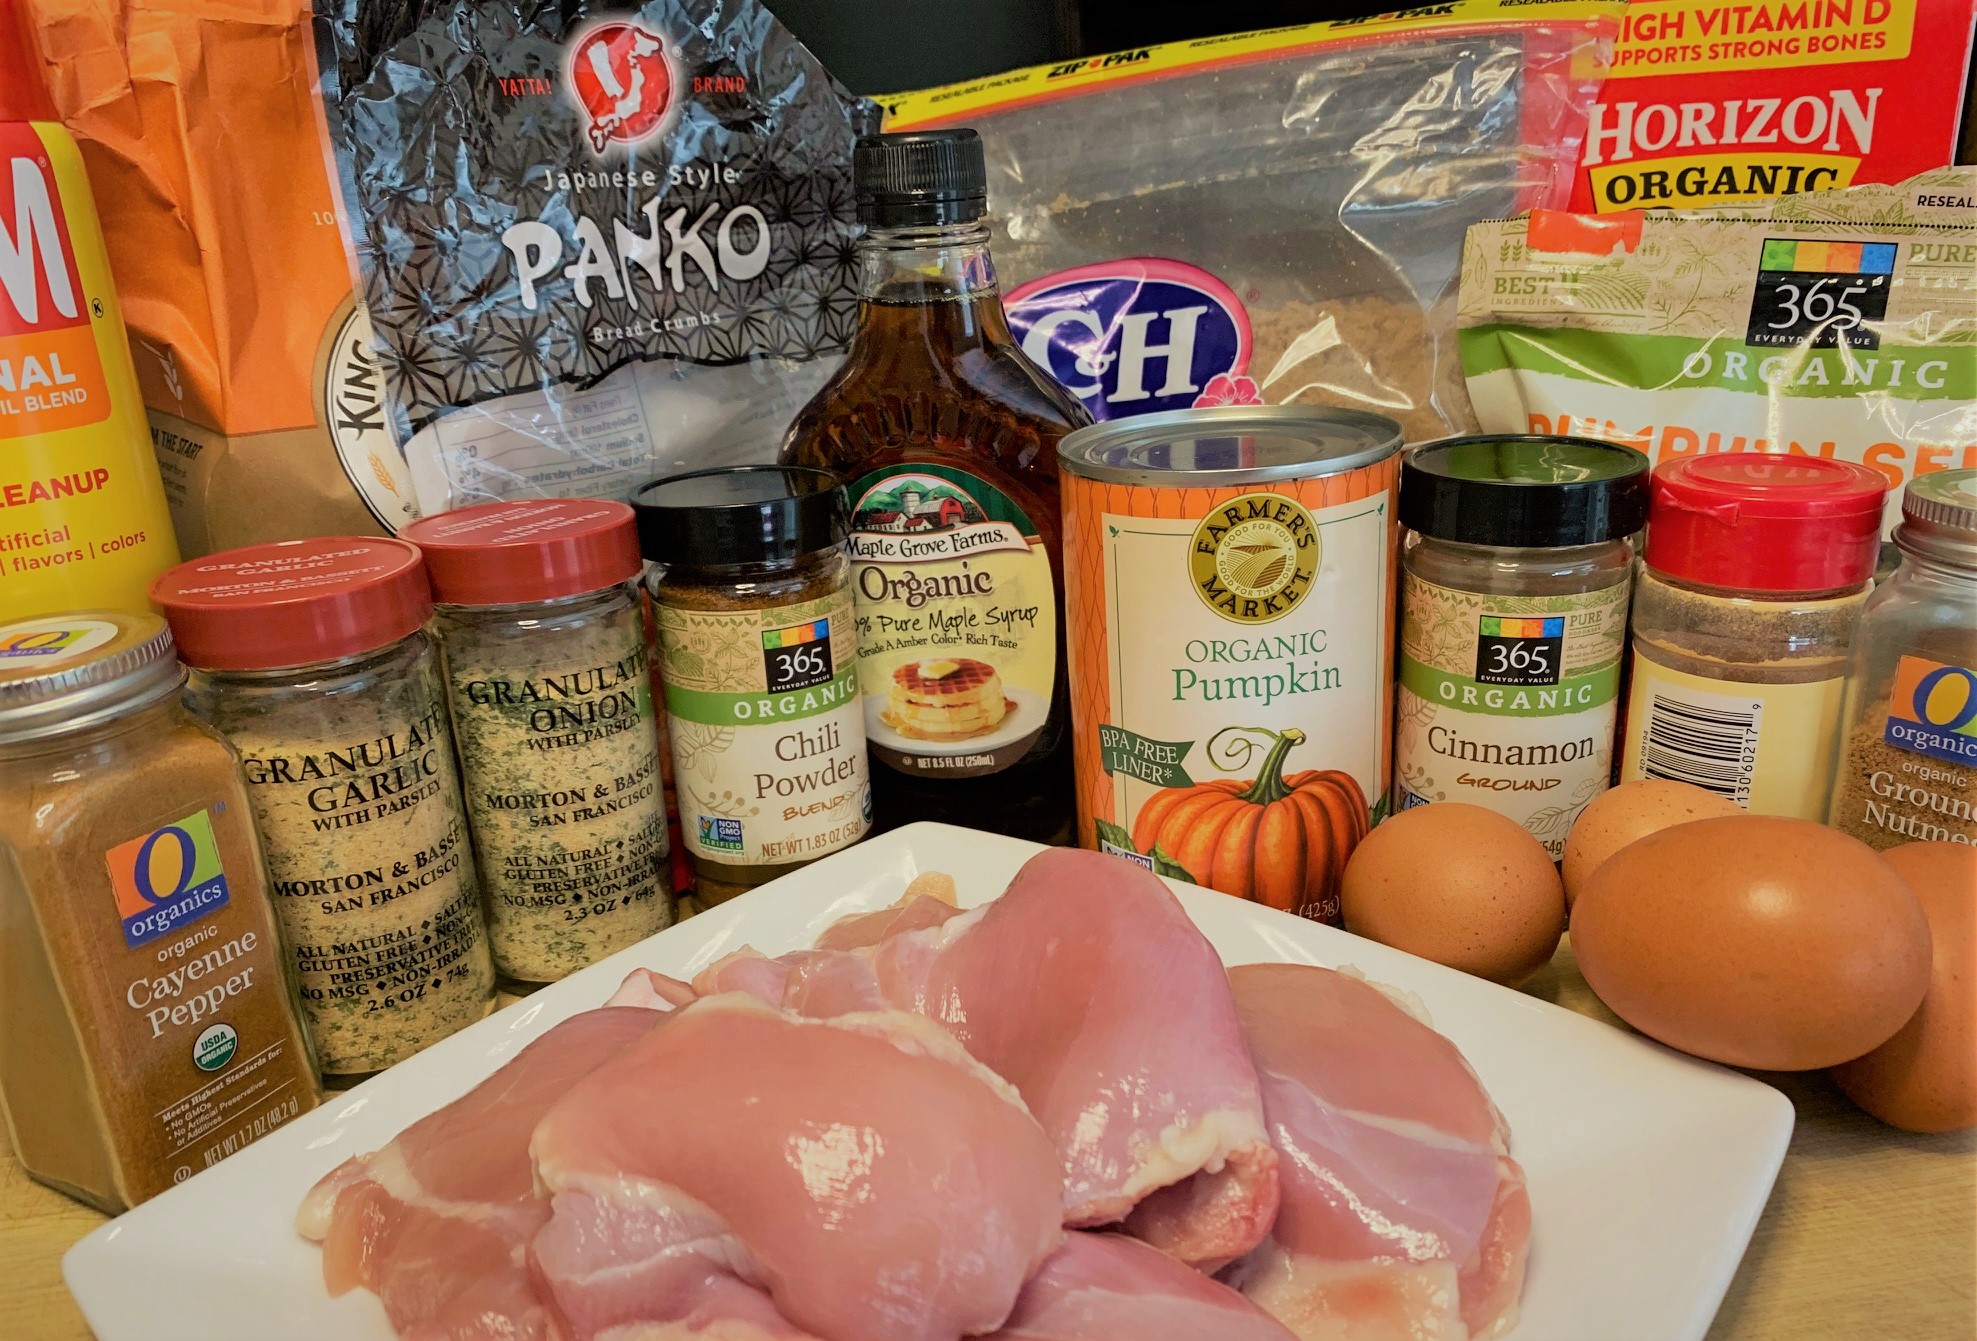
Our Ingredients
The list of components for our Pumpkin Mickey Waffles with Oven “Fried” Chicken and Candied Pumpkin Seeds is pretty straightforward. The waffles consist of all the typical seasonings you’d expect from anything pumpkin spice; cinnamon, ground ginger, ground nutmeg and, oh yeah, pumpkin.
For the chicken, we’ll also need a large array of spices. Those include chili powder, cayenne pepper, smoked paprika, etc. We will also be coating our “fried” chicken with panko bread crumbs. Which have become much easier to find in your local grocery store over the last several years. If you can’t find panko, however, traditional bread crumbs will work. I just prefer the texture created by the more coarse bread crumbs.
Speaking of the chicken. I will be using boneless, skinless chicken thighs for today’s recipe. This is because I happen to prefer the depth of flavor the dark meat provides for this type of dish. If you prefer, however, you can use whatever cut of chicken you normally enjoy. The only difference might be in the length of time it takes to cook.
Let’s get started!
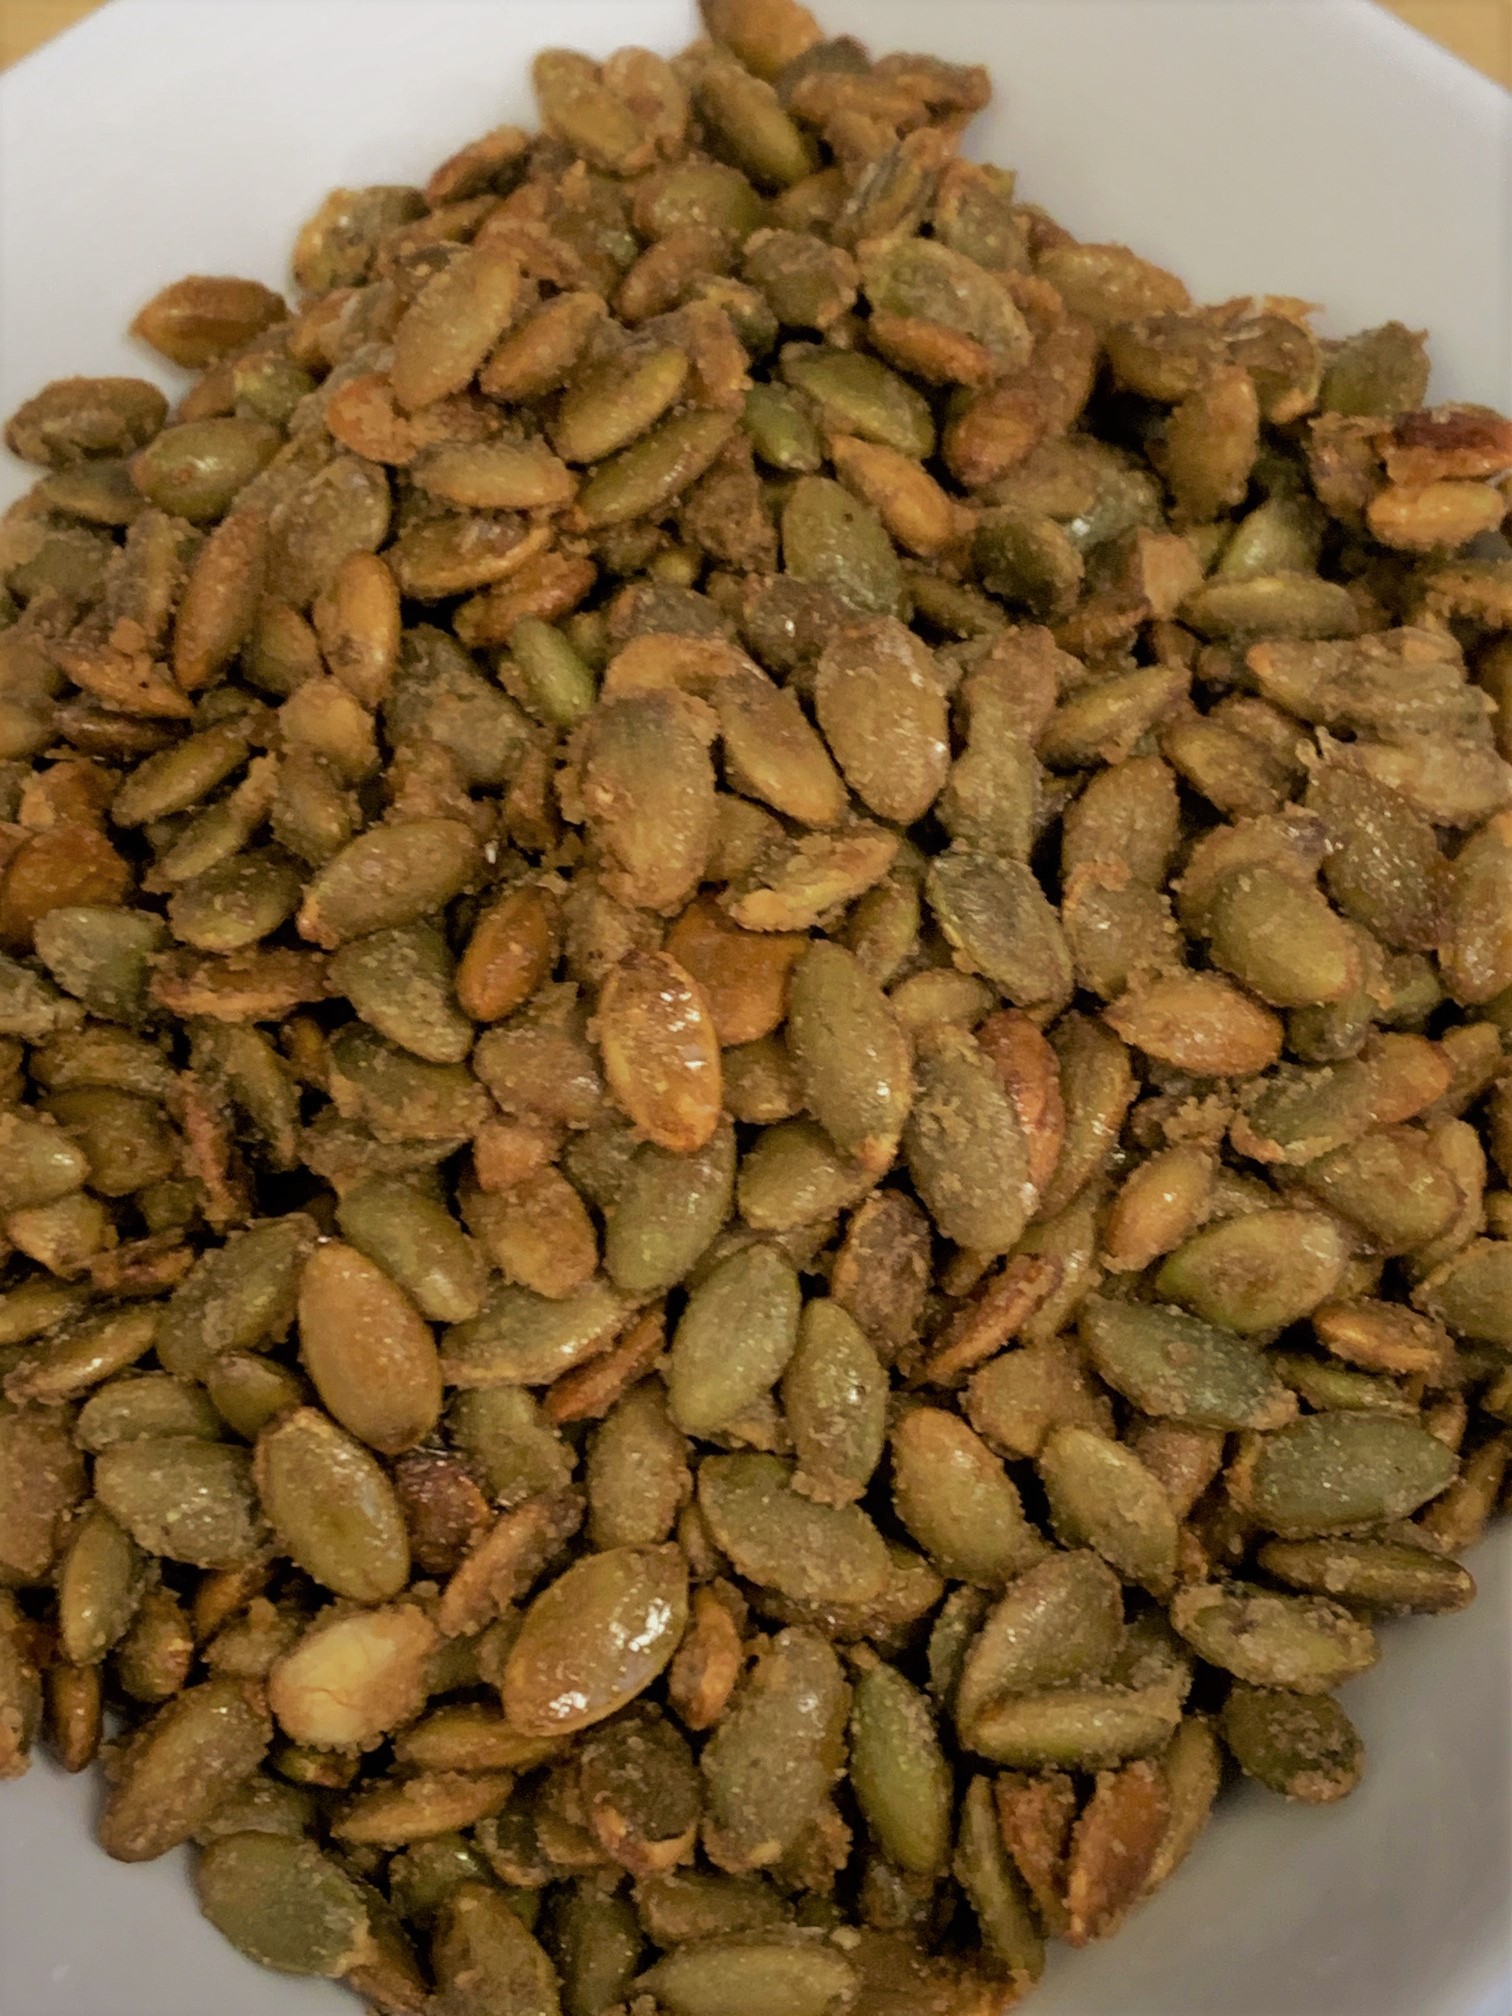
The Candied Pumpkin Seeds
We’ll start with the part of this dish that can be made well ahead of time and are fairly simple to create; the Candied Pumpkin Seeds.
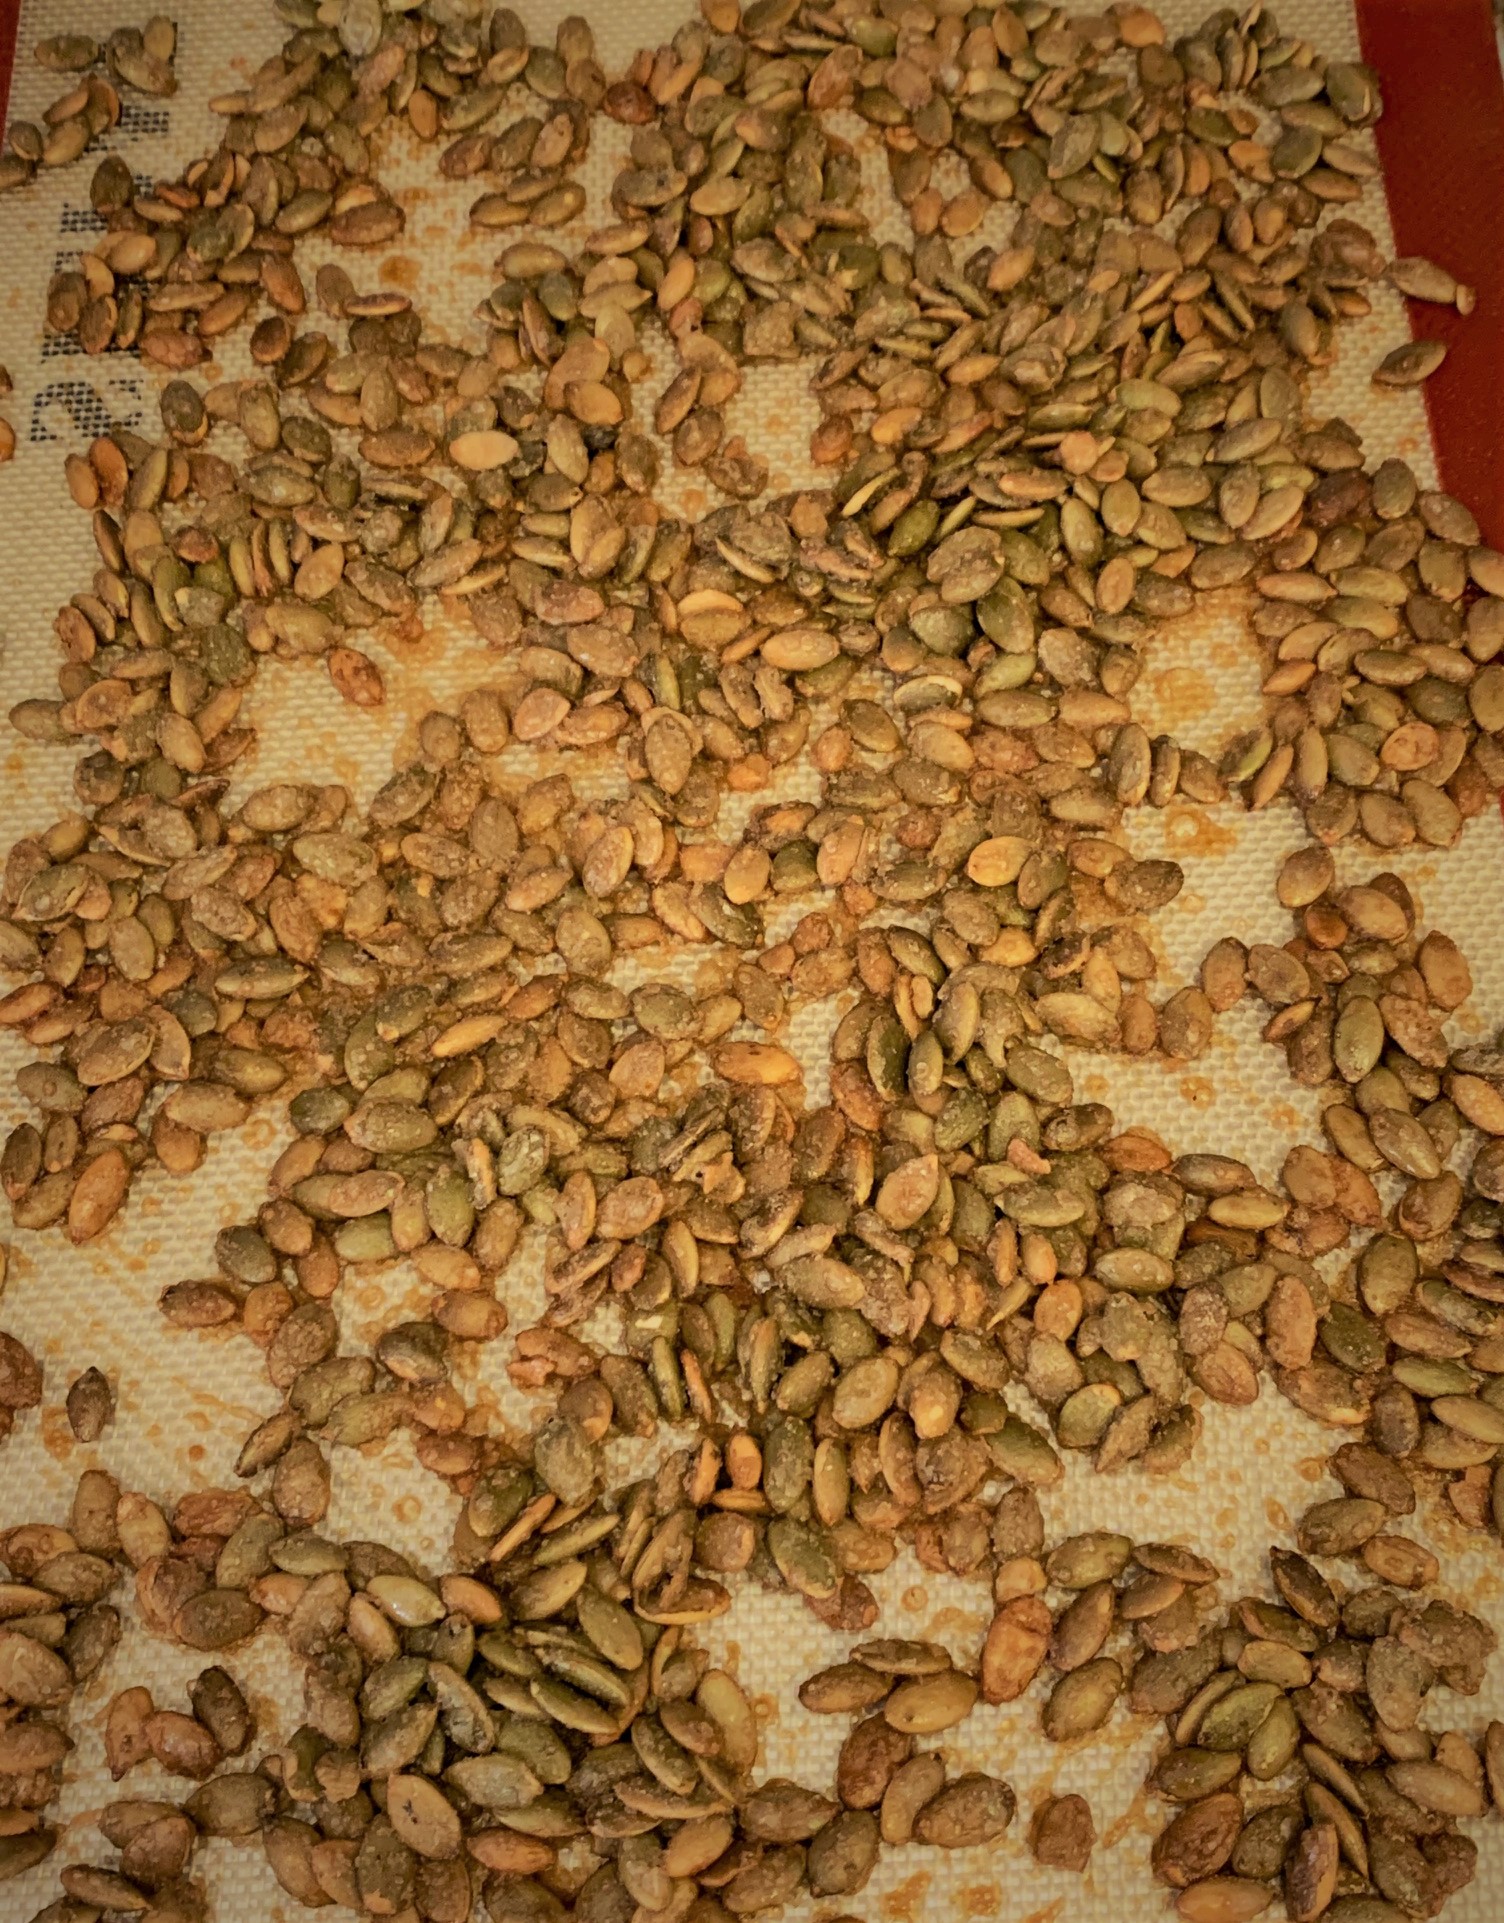
Begin by preheating your oven to 375ºF and placing a silicon cooking mat on a baking pan. Don’t worry if you don’t own one. You can also, simply, oil the pan to help make sure the seeds won’t stick.
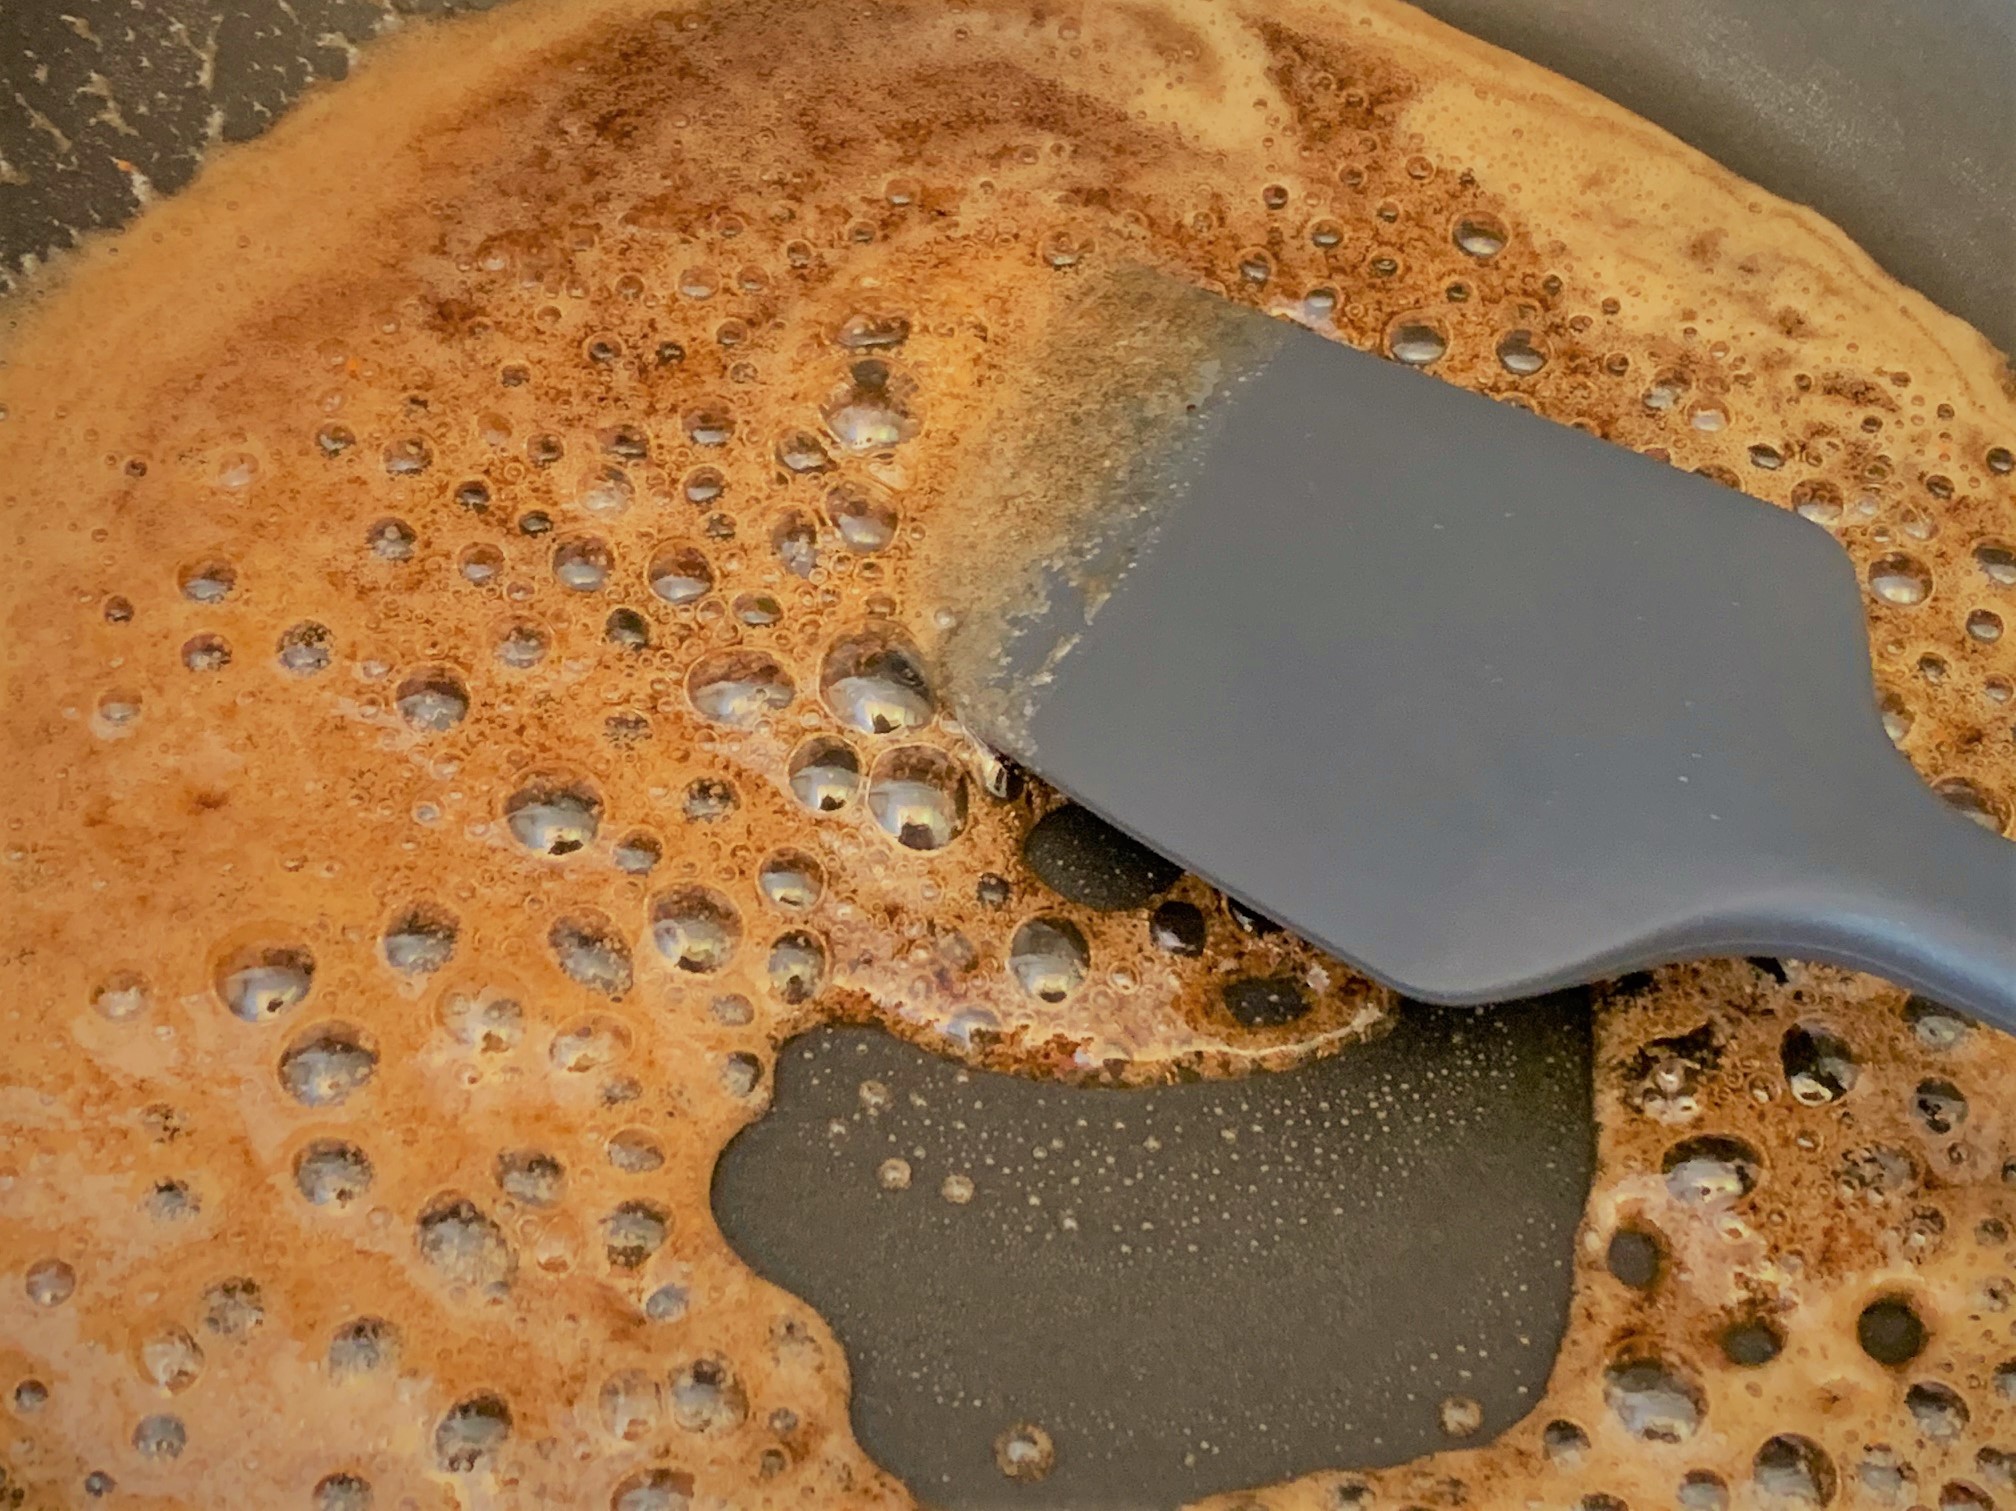
After that, you’ll want to add the Brown Sugar, Maple Syrup, Salt and Cayenne Pepper to a small pan over medium heat and stir to combine. Heat, stirring regularly, until the sugar has melted and the mixture begins to foam like in the photo below.
Next, you’ll want to add the Pumpkin Seeds and stir until thoroughly coated. Then spread the coated seeds evenly on the baking sheet. Place in the oven and roast at 375ºF for 5 minutes. Give the seeds a stir and place back in the oven to cook for an additional 5 minutes.
Remove and allow to cool completely. You can use them immediately or store them in an air-tight container for up to 7 days.
The Oven “Fried” Chicken
Aside from the inclusion of pumpkin, this is the other area where we’re going to deviate from your traditional Chicken & Waffles recipe. I decided it might be better to use a slightly healthier version of the chicken part of this dish, however.
Why did I do this?
Well, for a couple reasons.
First off, I try to lean toward a healthier version of most dishes. There are enough calories and carbs in this recipe as it is. So, I decided it might be better to cut a little of the fat from the oil.
Secondly, I find this an easier recipe that can be thrown together fairly quickly on a standard weekday evening.
Now, is this recipe as good as a traditional fried chicken? Probably not. Put it is really delicious, easy to throw together and perfect for this dish.
Our Breading
To get the crispy, “fried” effect for our chicken, we’ll need to set up a traditional “breading station”. This, usually, consists of three elements. A straightforward flour dip; an egg-wash; and the final coating. All work together to make sure the crust will stay on whatever you’re cooking.
The most important element of this is the bread crumb mixture. So that’s where we’ll start. Add the Panko Bread Crumbs, ½ cup of the All-Purpose Flour, Chili Powder, Smoked Paprika, Granulated Garlic, Granulated Onion, Cayenne Pepper, Salt and Freshly Ground Pepper to a large, shallow bowl and stir until completely combined.
For the egg wash, place the Eggs, Water, Salt and Pepper into a bowl and beat until well combined.
Finally, add the remaining All-Purpose Flour, Salt and Pepper to another large, shallow bowl and stir until well combined.
Place the bowls close together in the order of Flour, Egg-Wash and Bread Crumbs.
Next, take whatever cut of chicken you will be using and season with Salt and Pepper.
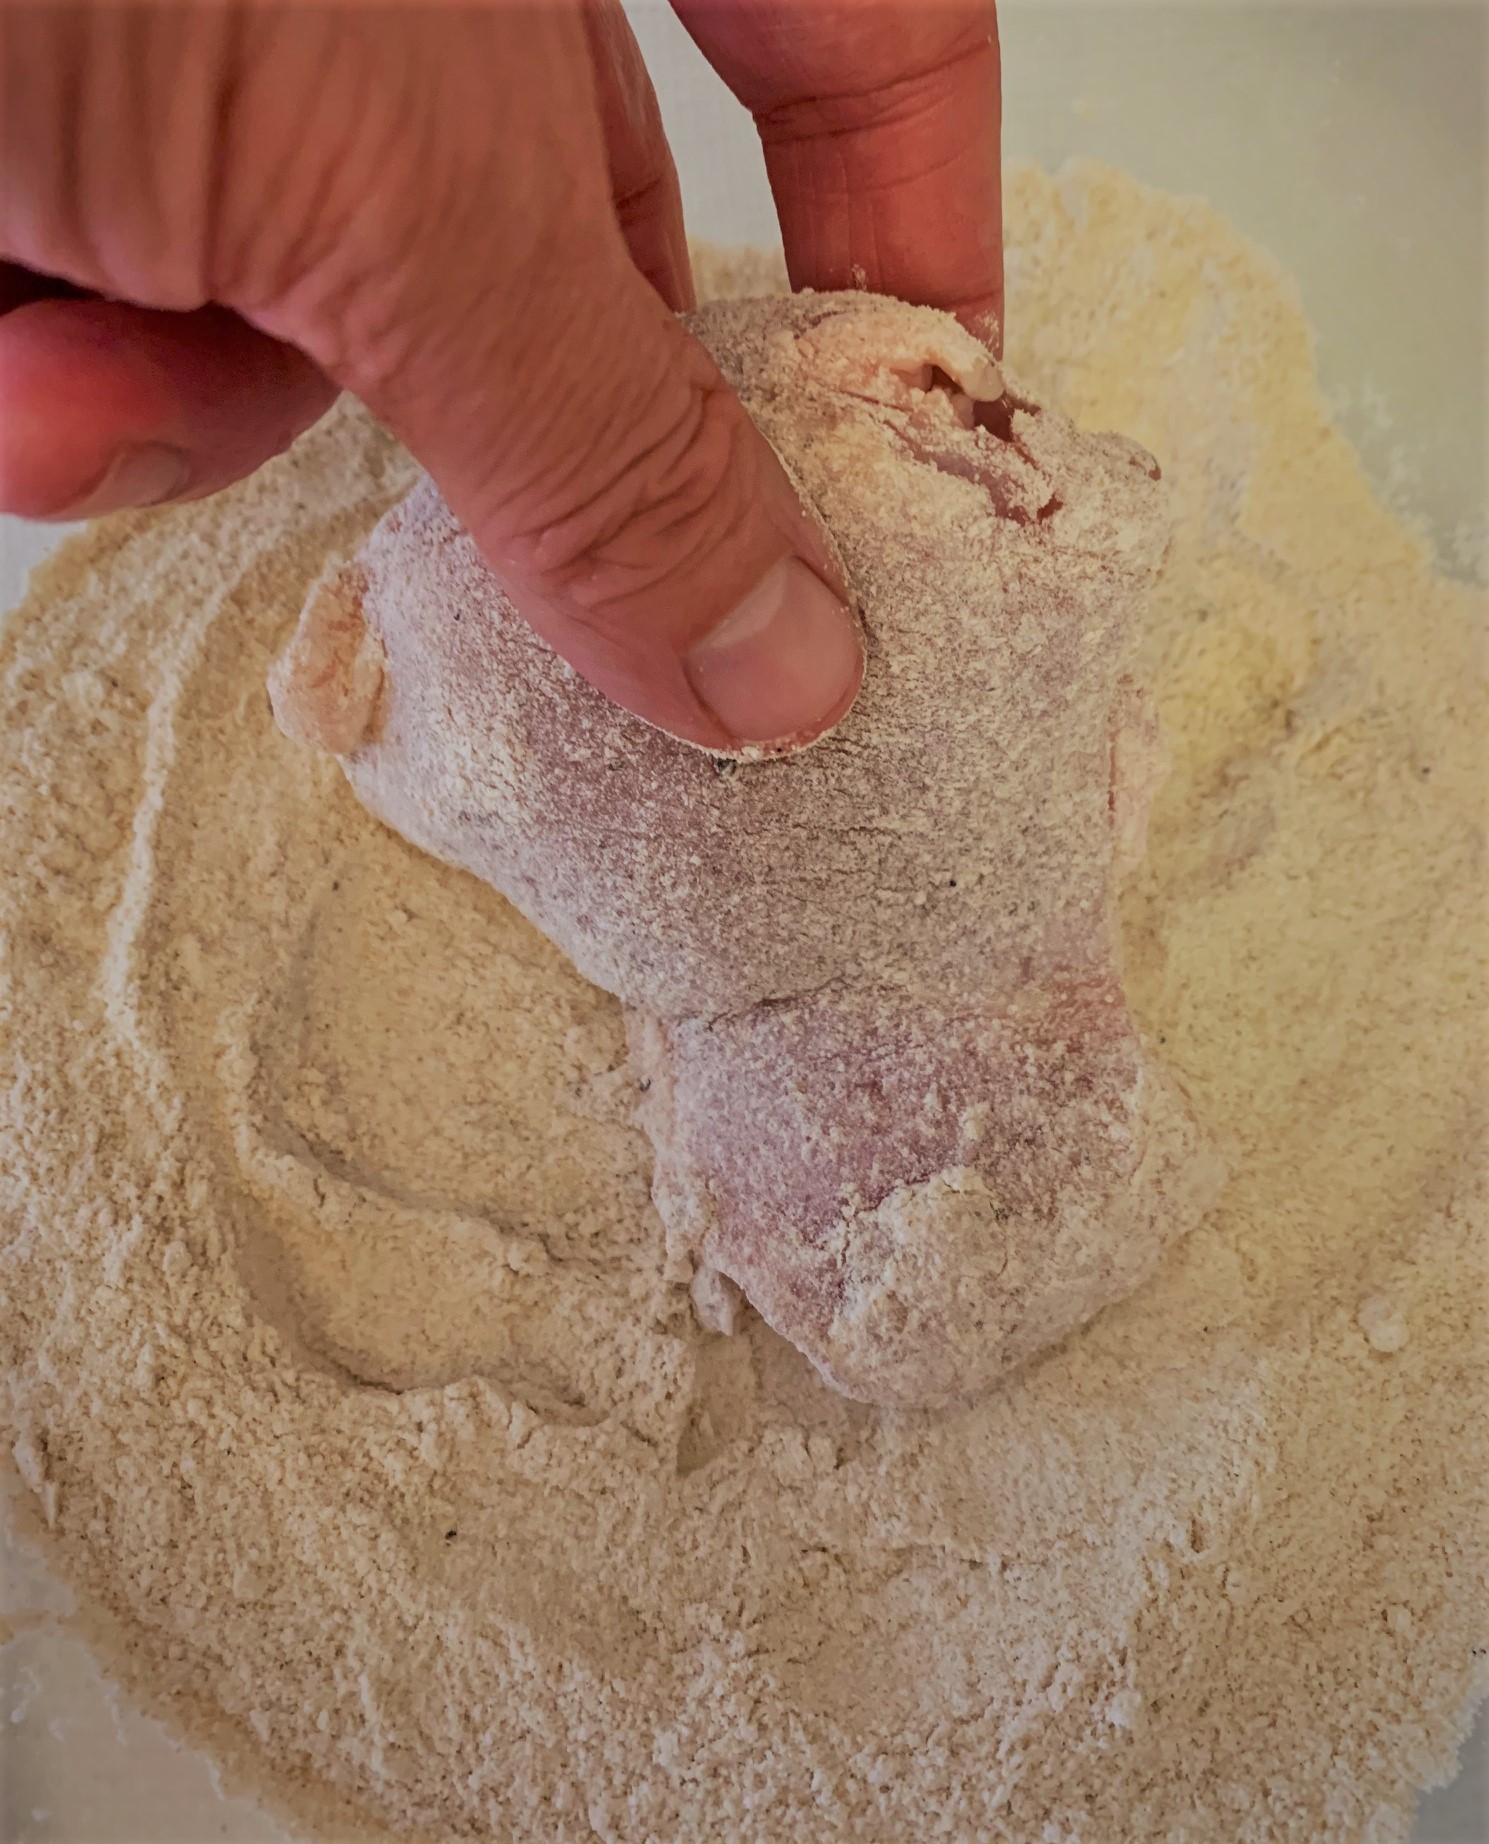
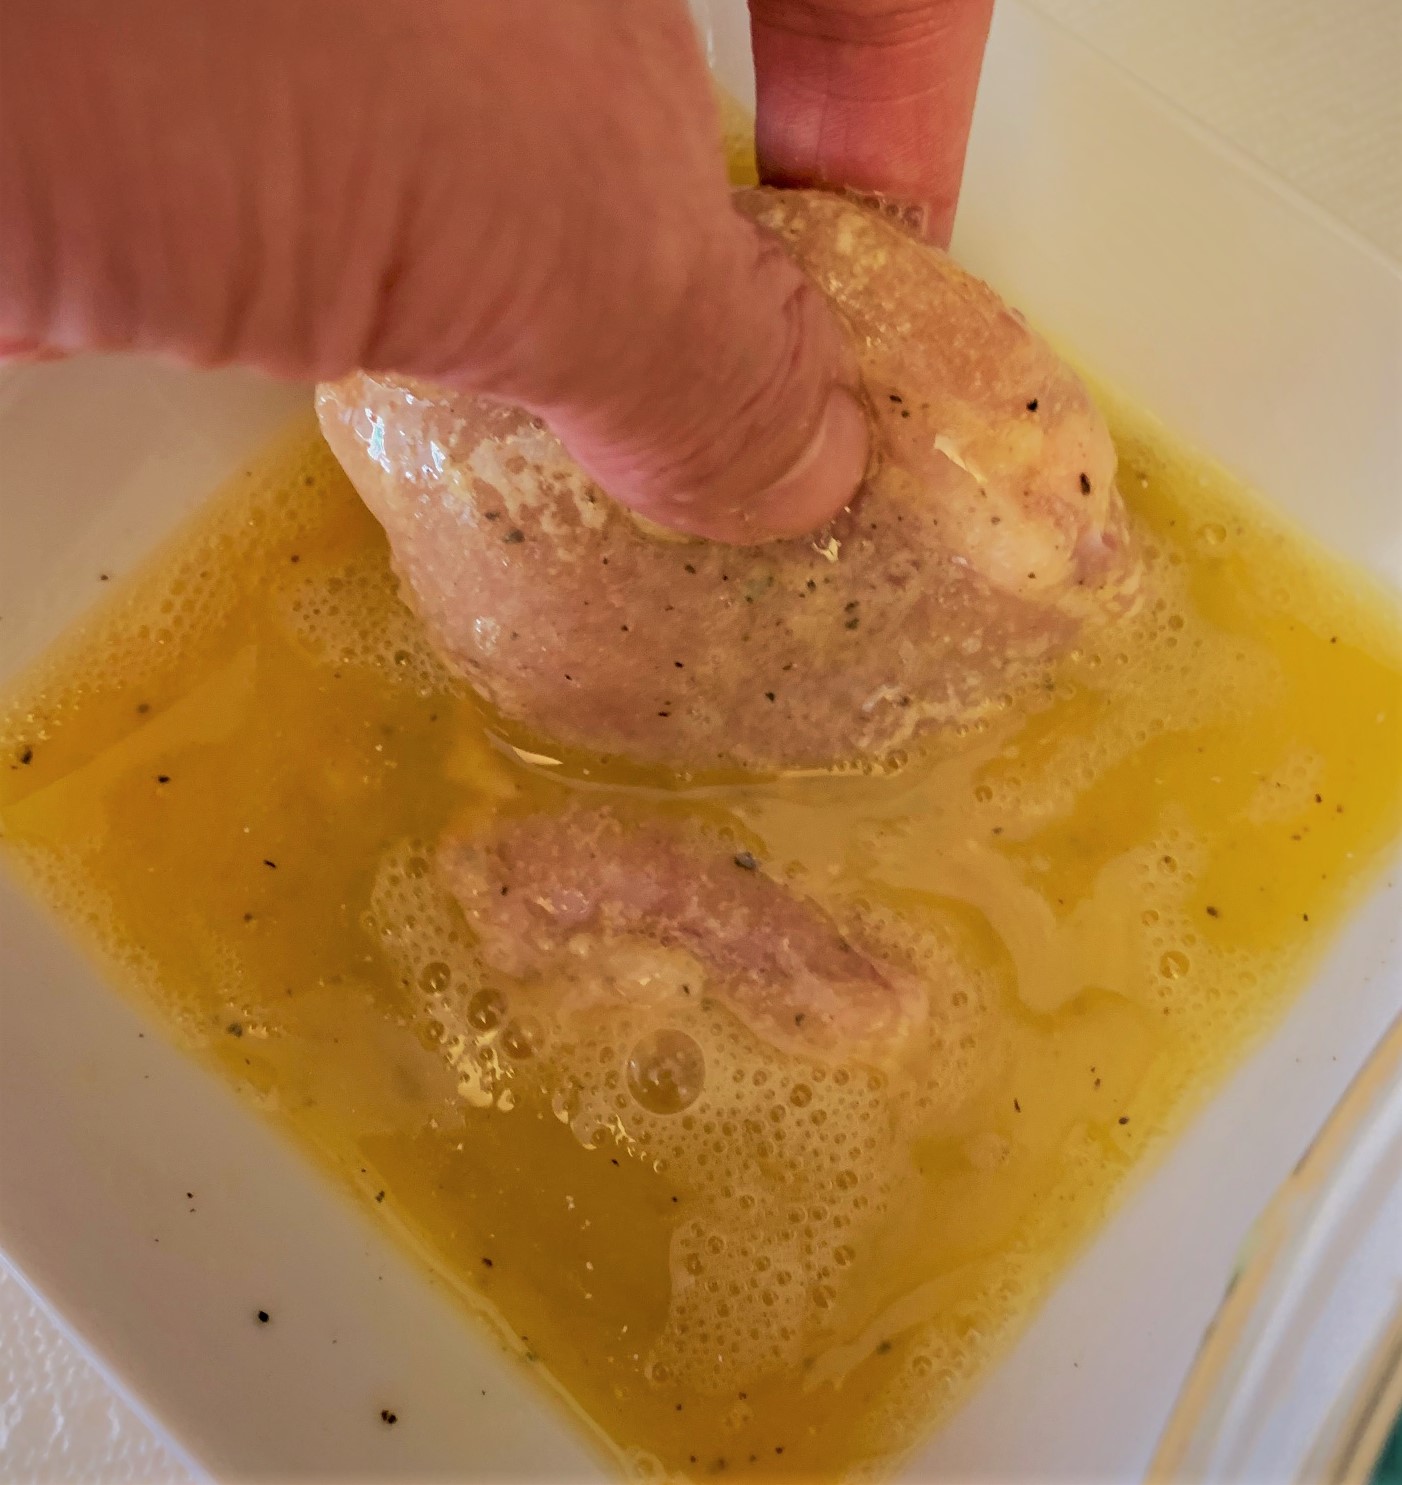
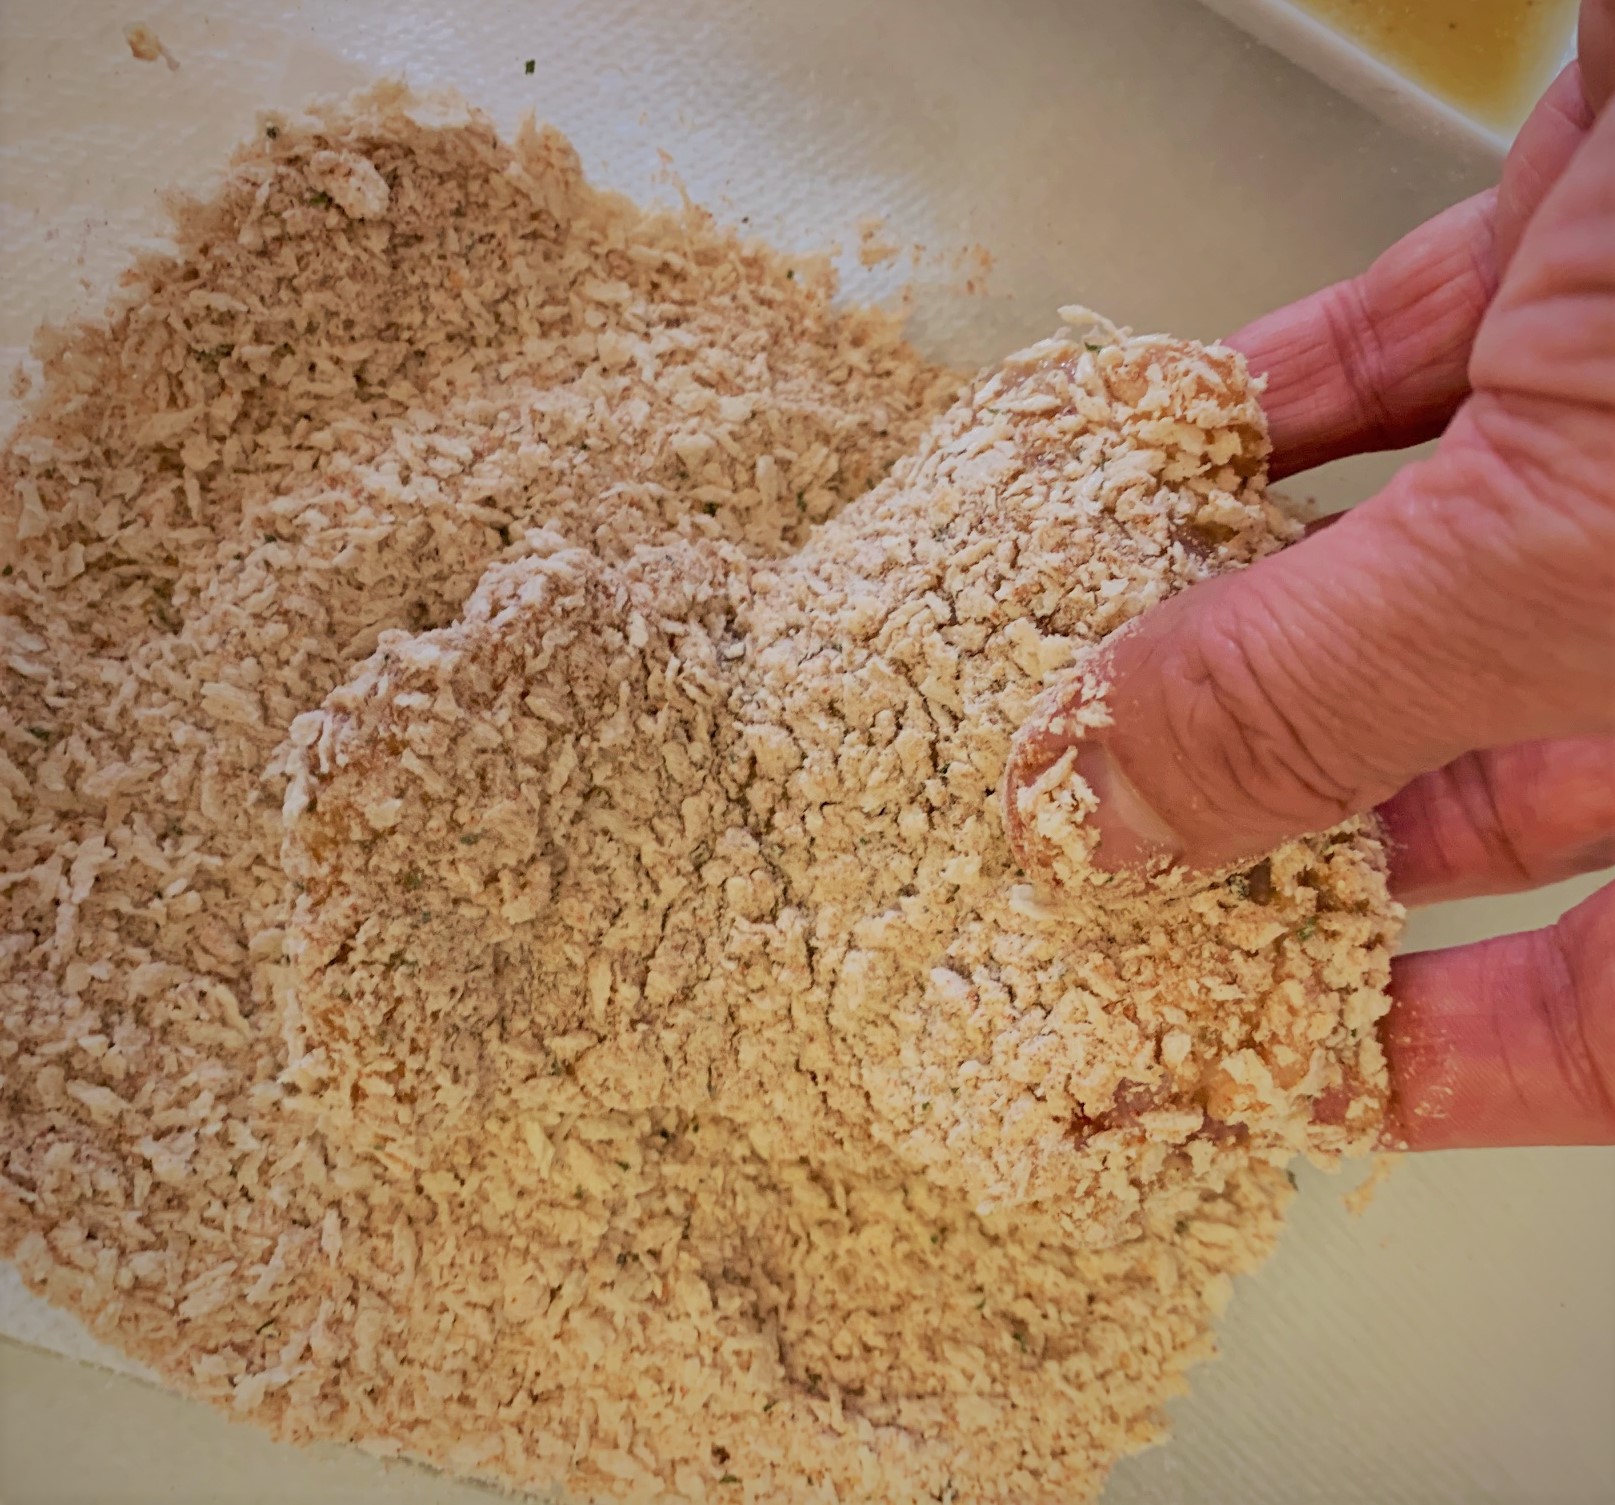
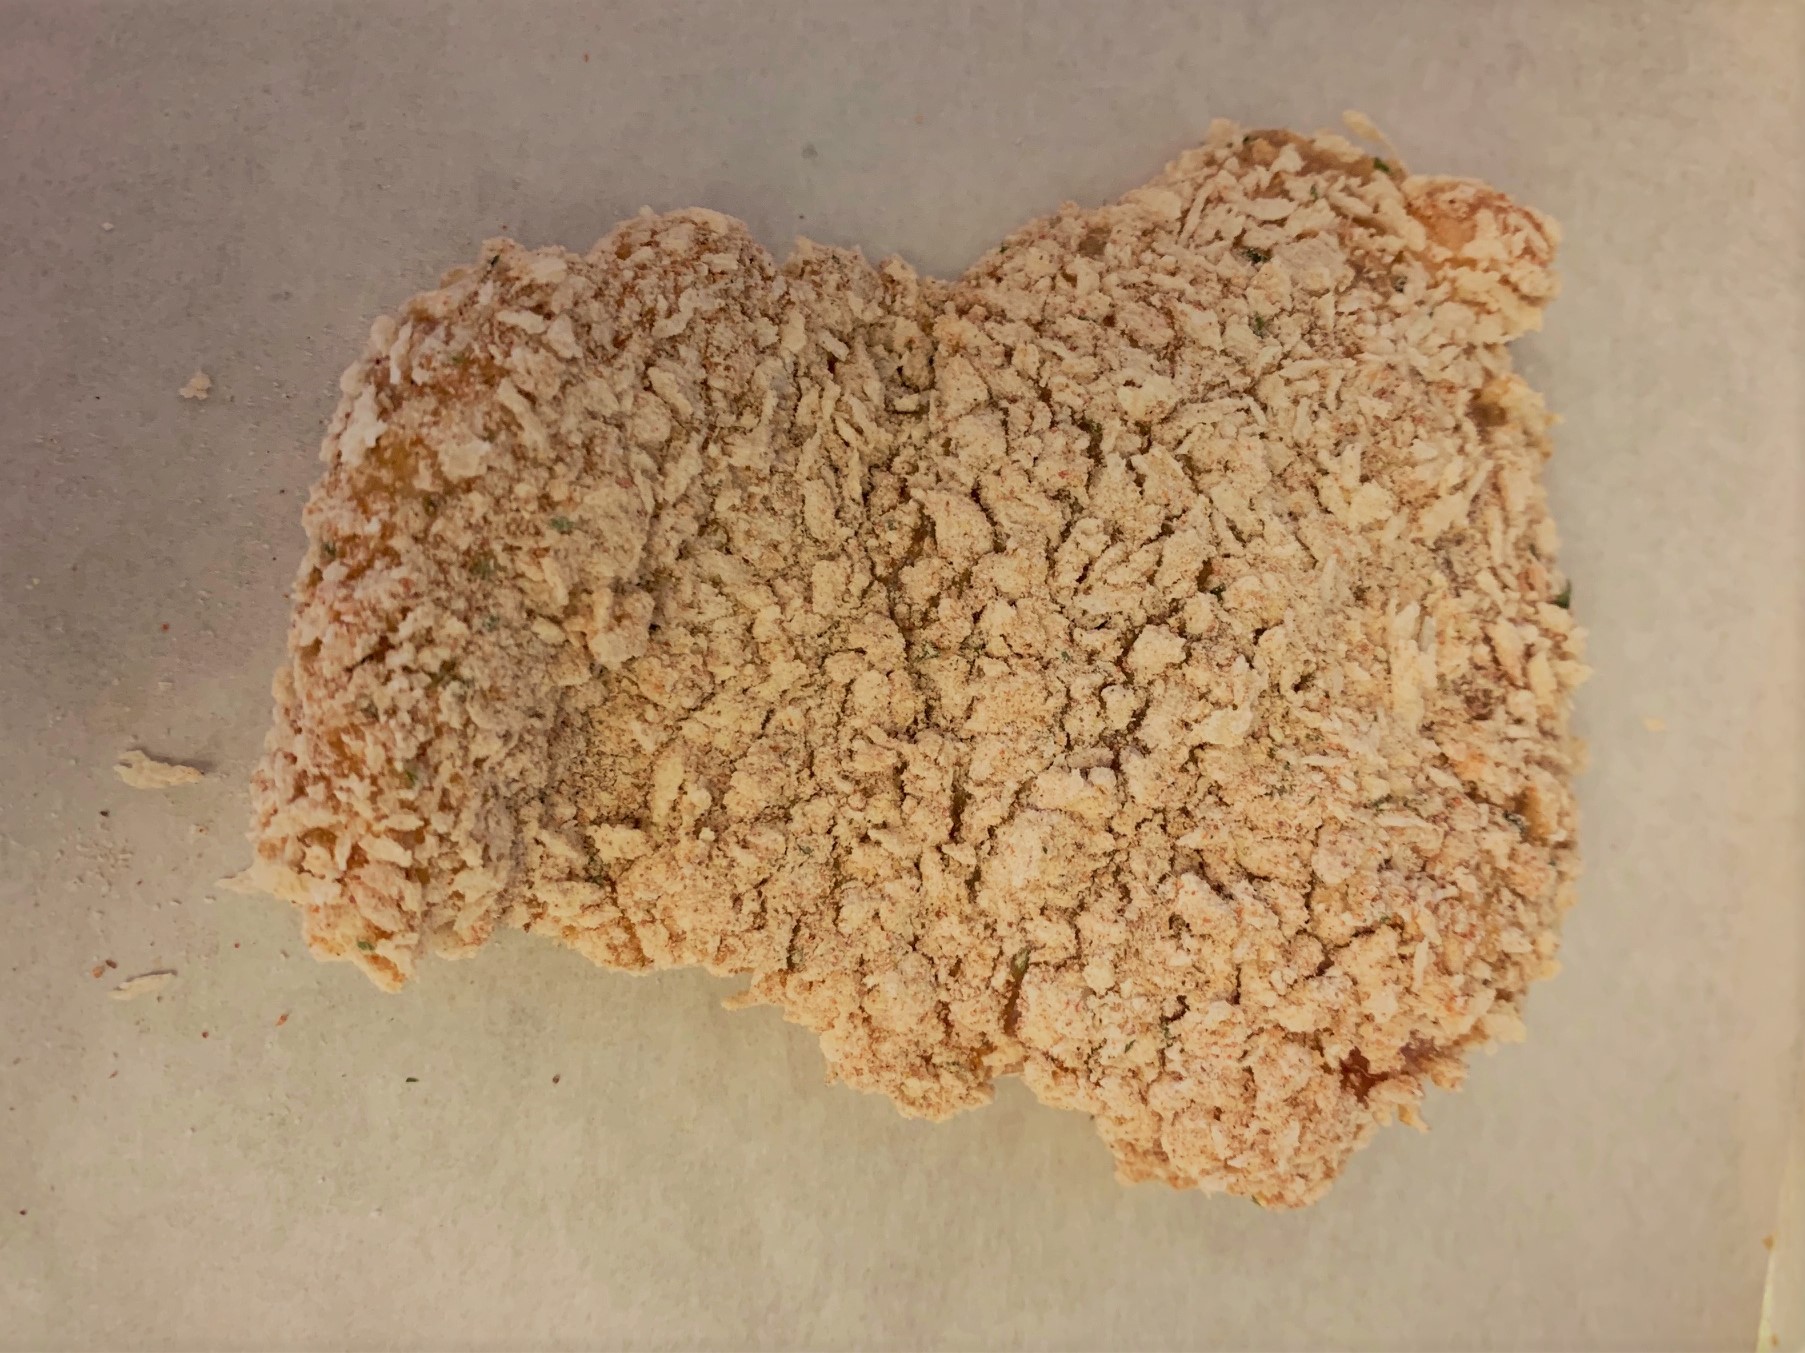
Now, I figure you might know how to bread something from here but, just in case you’ve never done it, I’m going to show you the steps in the photos below.
Step 1 – Dip the seasoned Chicken into the Flour Bowl and dredge through until completely covered. Shake off any excess.
Step 2 – Dip the Floured Chicken into the Egg-Wash Mixture and coat completely. Let any excess drip back into the bowl.
Step 3 – Dip the Egg-Washed Chicken into the Seasoned Bread Crumbs Bowl and coat completely.
Step 4 – Place the Completely Breaded Chicken on to the baking sheet.
- Tip – Use one hand to dip the chicken into the dry ingredients and the other to dip it in the wet ingredients. This will help keep the breadcrumbs on the chicken rather than on your fingers.
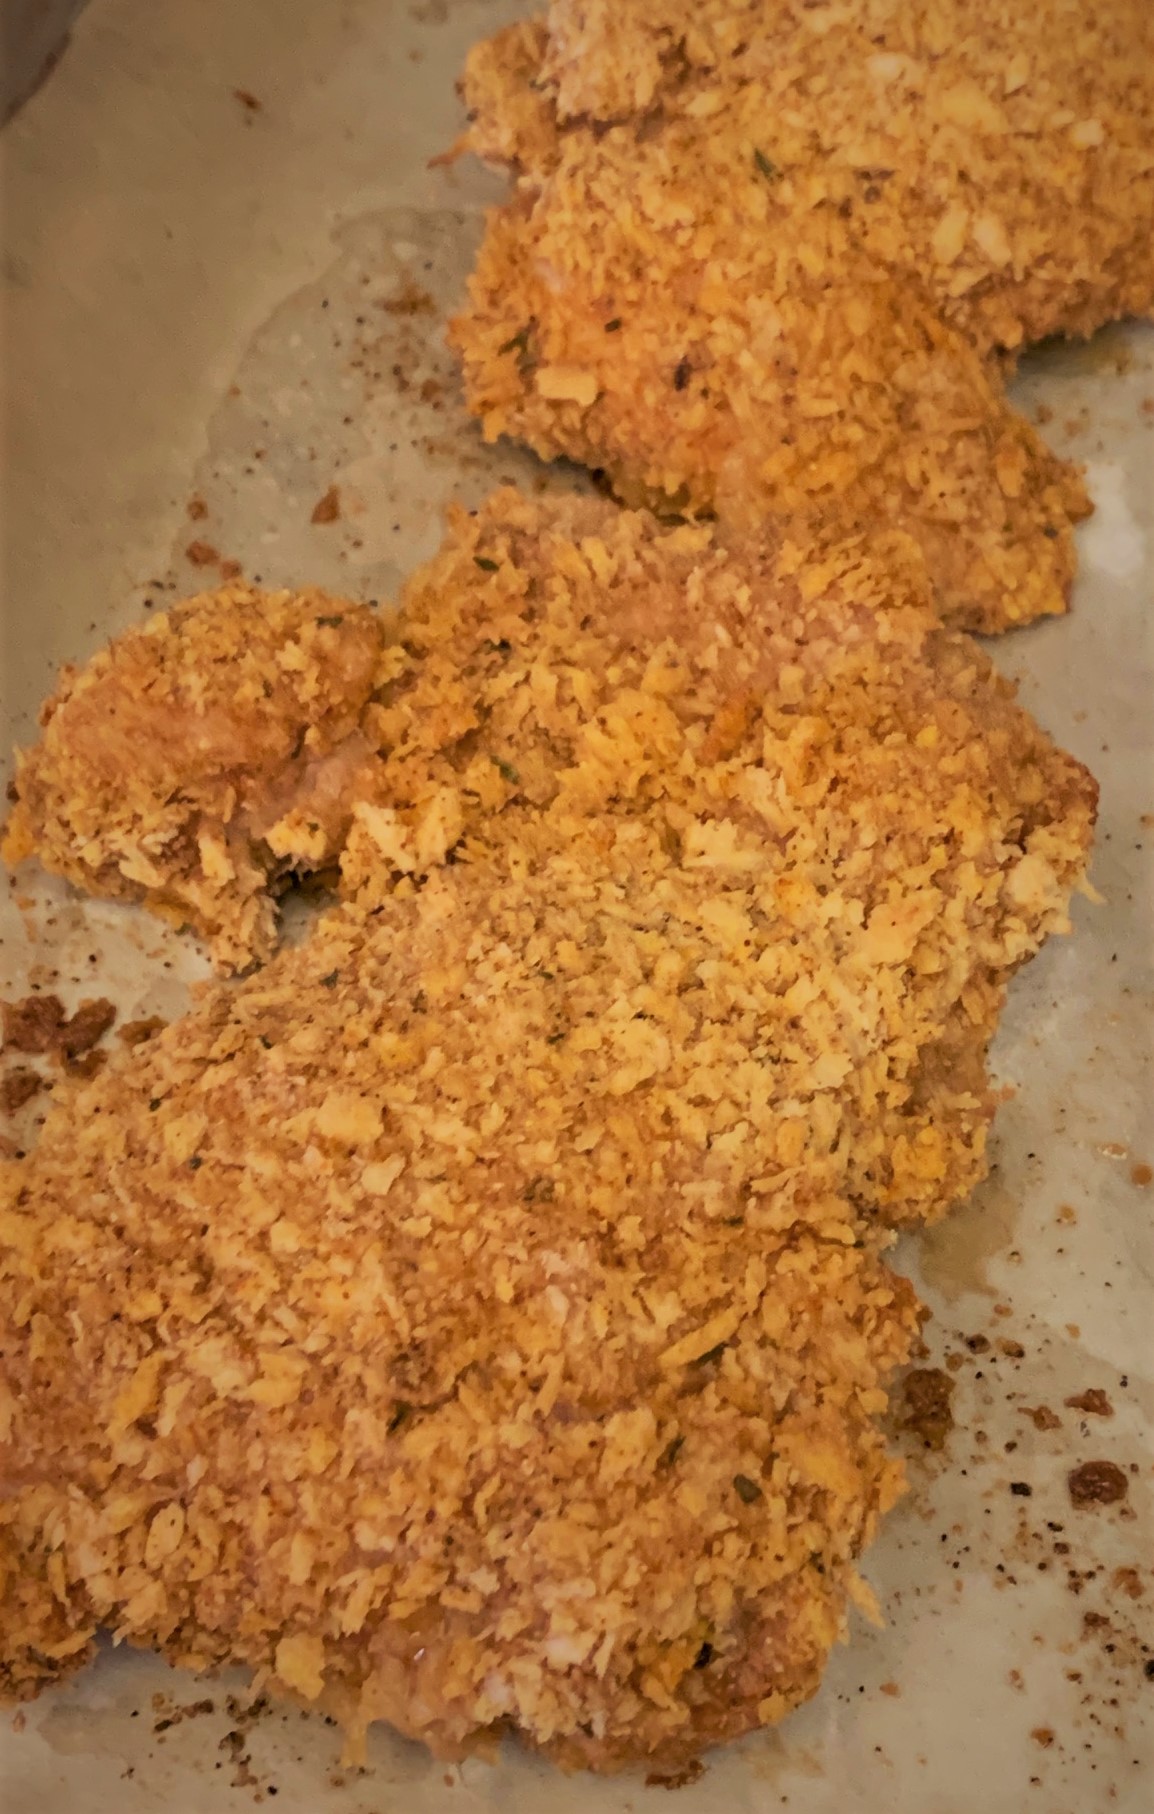
Once you’ve breaded all of the chicken and placed it on the baking sheet, spray the top with cooking spray until all pieces are liberally coated. Place the pan in a preheated 400ºF oven and roast for approximately 30 mins. You’ll know the chicken is done when the coating is golden brown and a thermometer inserted in the center of each piece reads 165ºF.
Let rest for 5 minutes and serve warm.
The Pumpkin Mickey Waffles
We move on to the base of our dish and our biggest Pumpkin Spice component; our Pumpkin Mickey Waffles.
- Now, I understand not everyone has a Mickey Waffle Maker like we do. That’s okay! This dish works just as well in a traditional waffle maker. However, we know all things that are shaped like Mickey taste just a little better. So, if you’re interested in adding a little more Disney to your waffles, you can purchase the same Mickey Waffle Maker right here!
To create our batter, we first need to start by separating the Eggs. Place the whites in the bowl of an electric mixer and yolks in a separate, medium sized bowl.
Add the Pumpkin Purée, Milk, and Melted Butter to the Egg Yolks and stir until well combined.
Meanwhile, place the Brown Sugar and Cornstarch in a large bowl and combine. Add the All-Purpose Flour, Baking Powder, Salt, Cinnamon, Ground Ginger, and Ground Nutmeg and stir until all the ingredients are well combined.
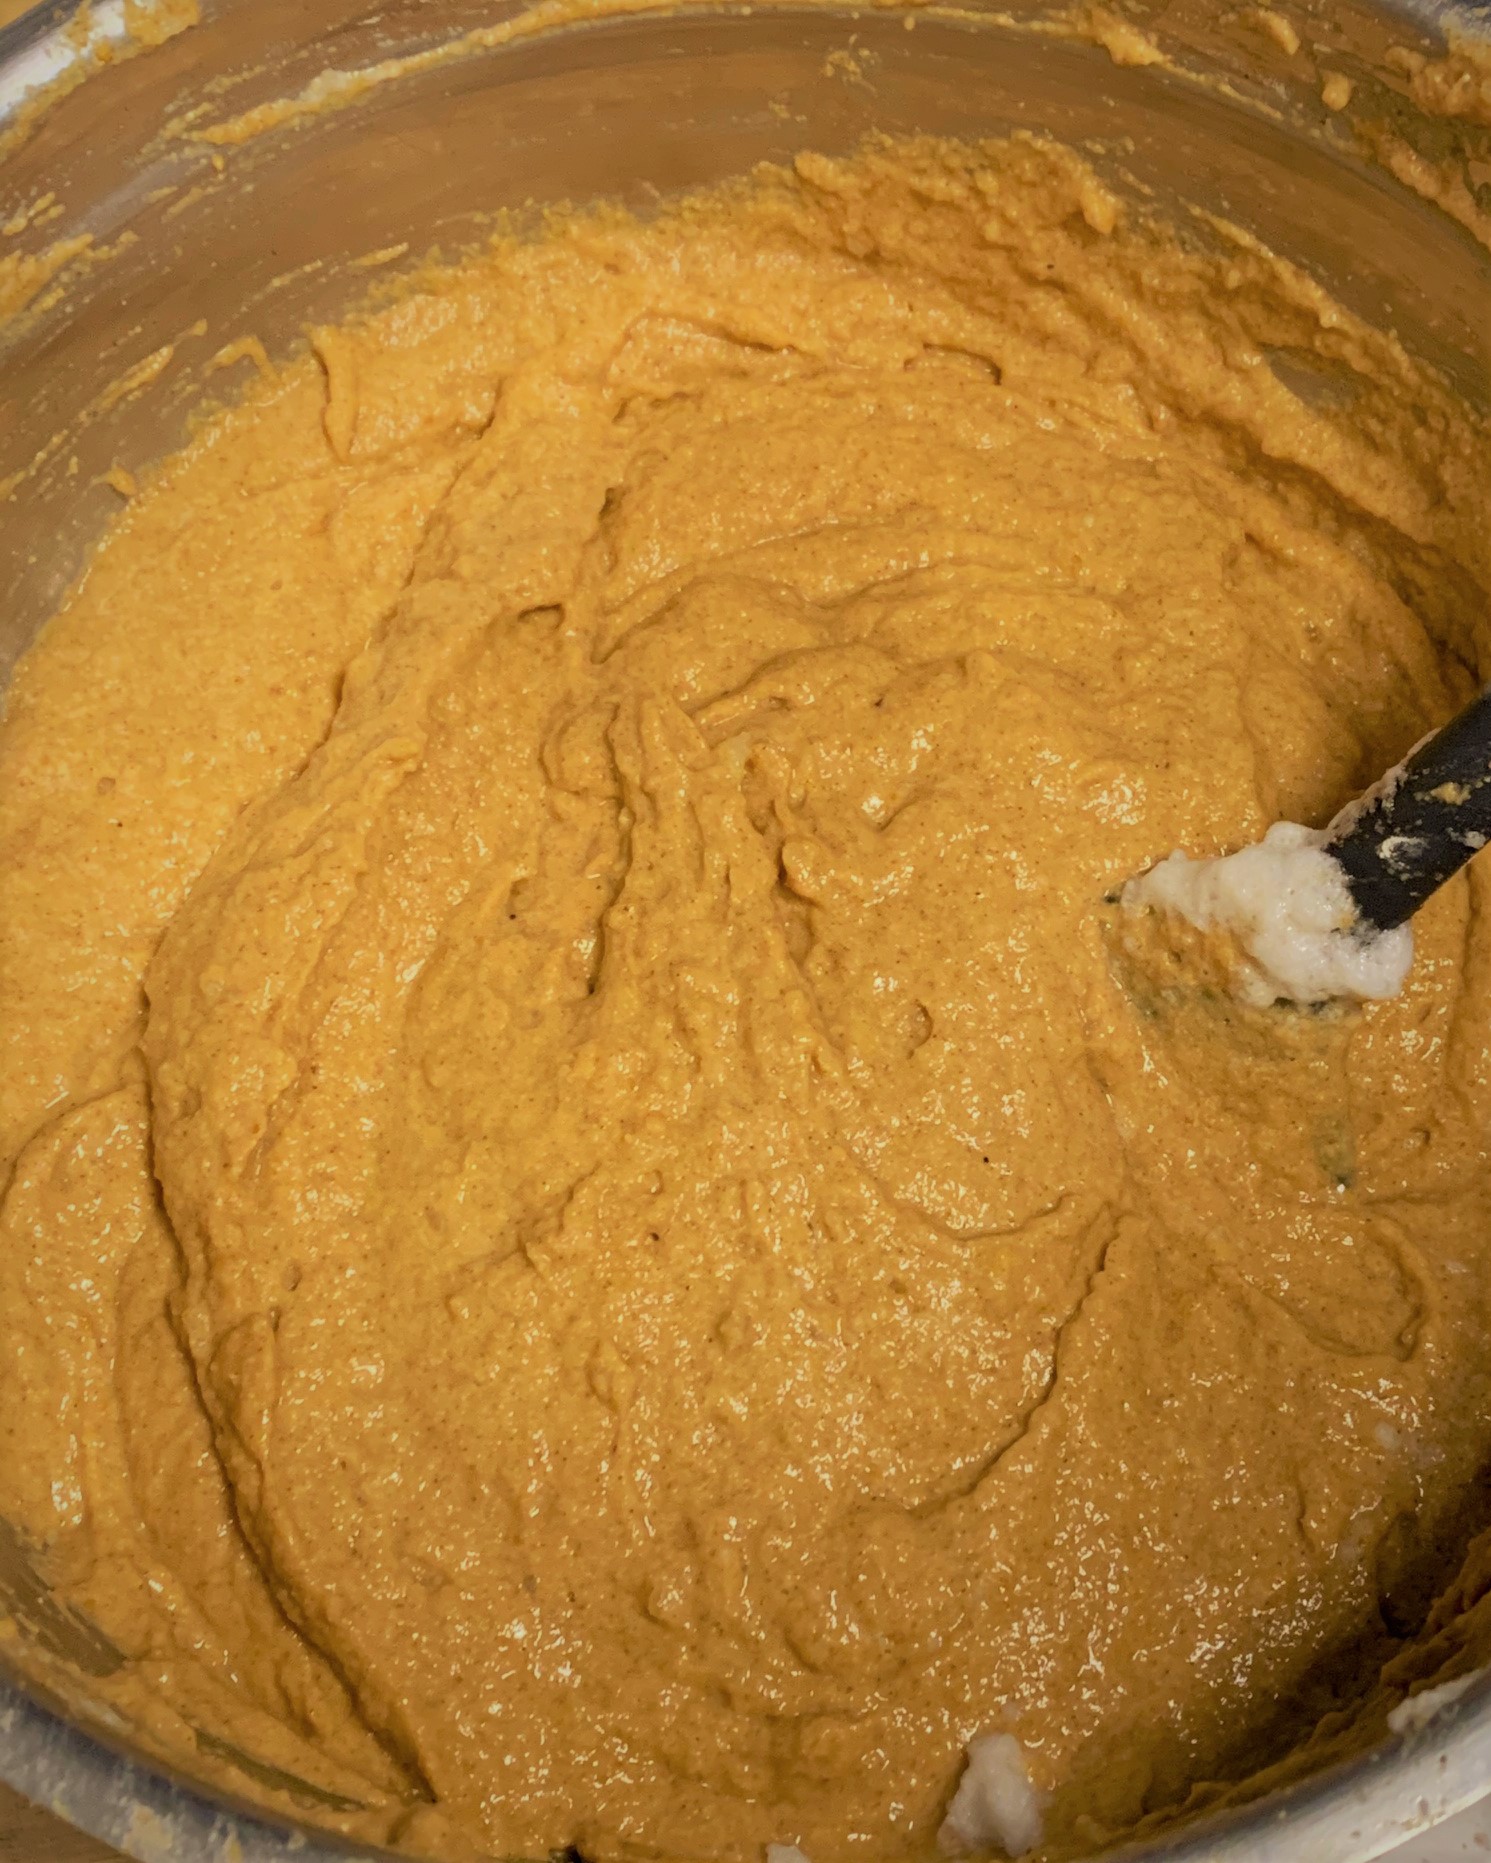
Next, add the Pumpkin – Egg Yolk mixture to the Flour Mixture and stir until completely combined.
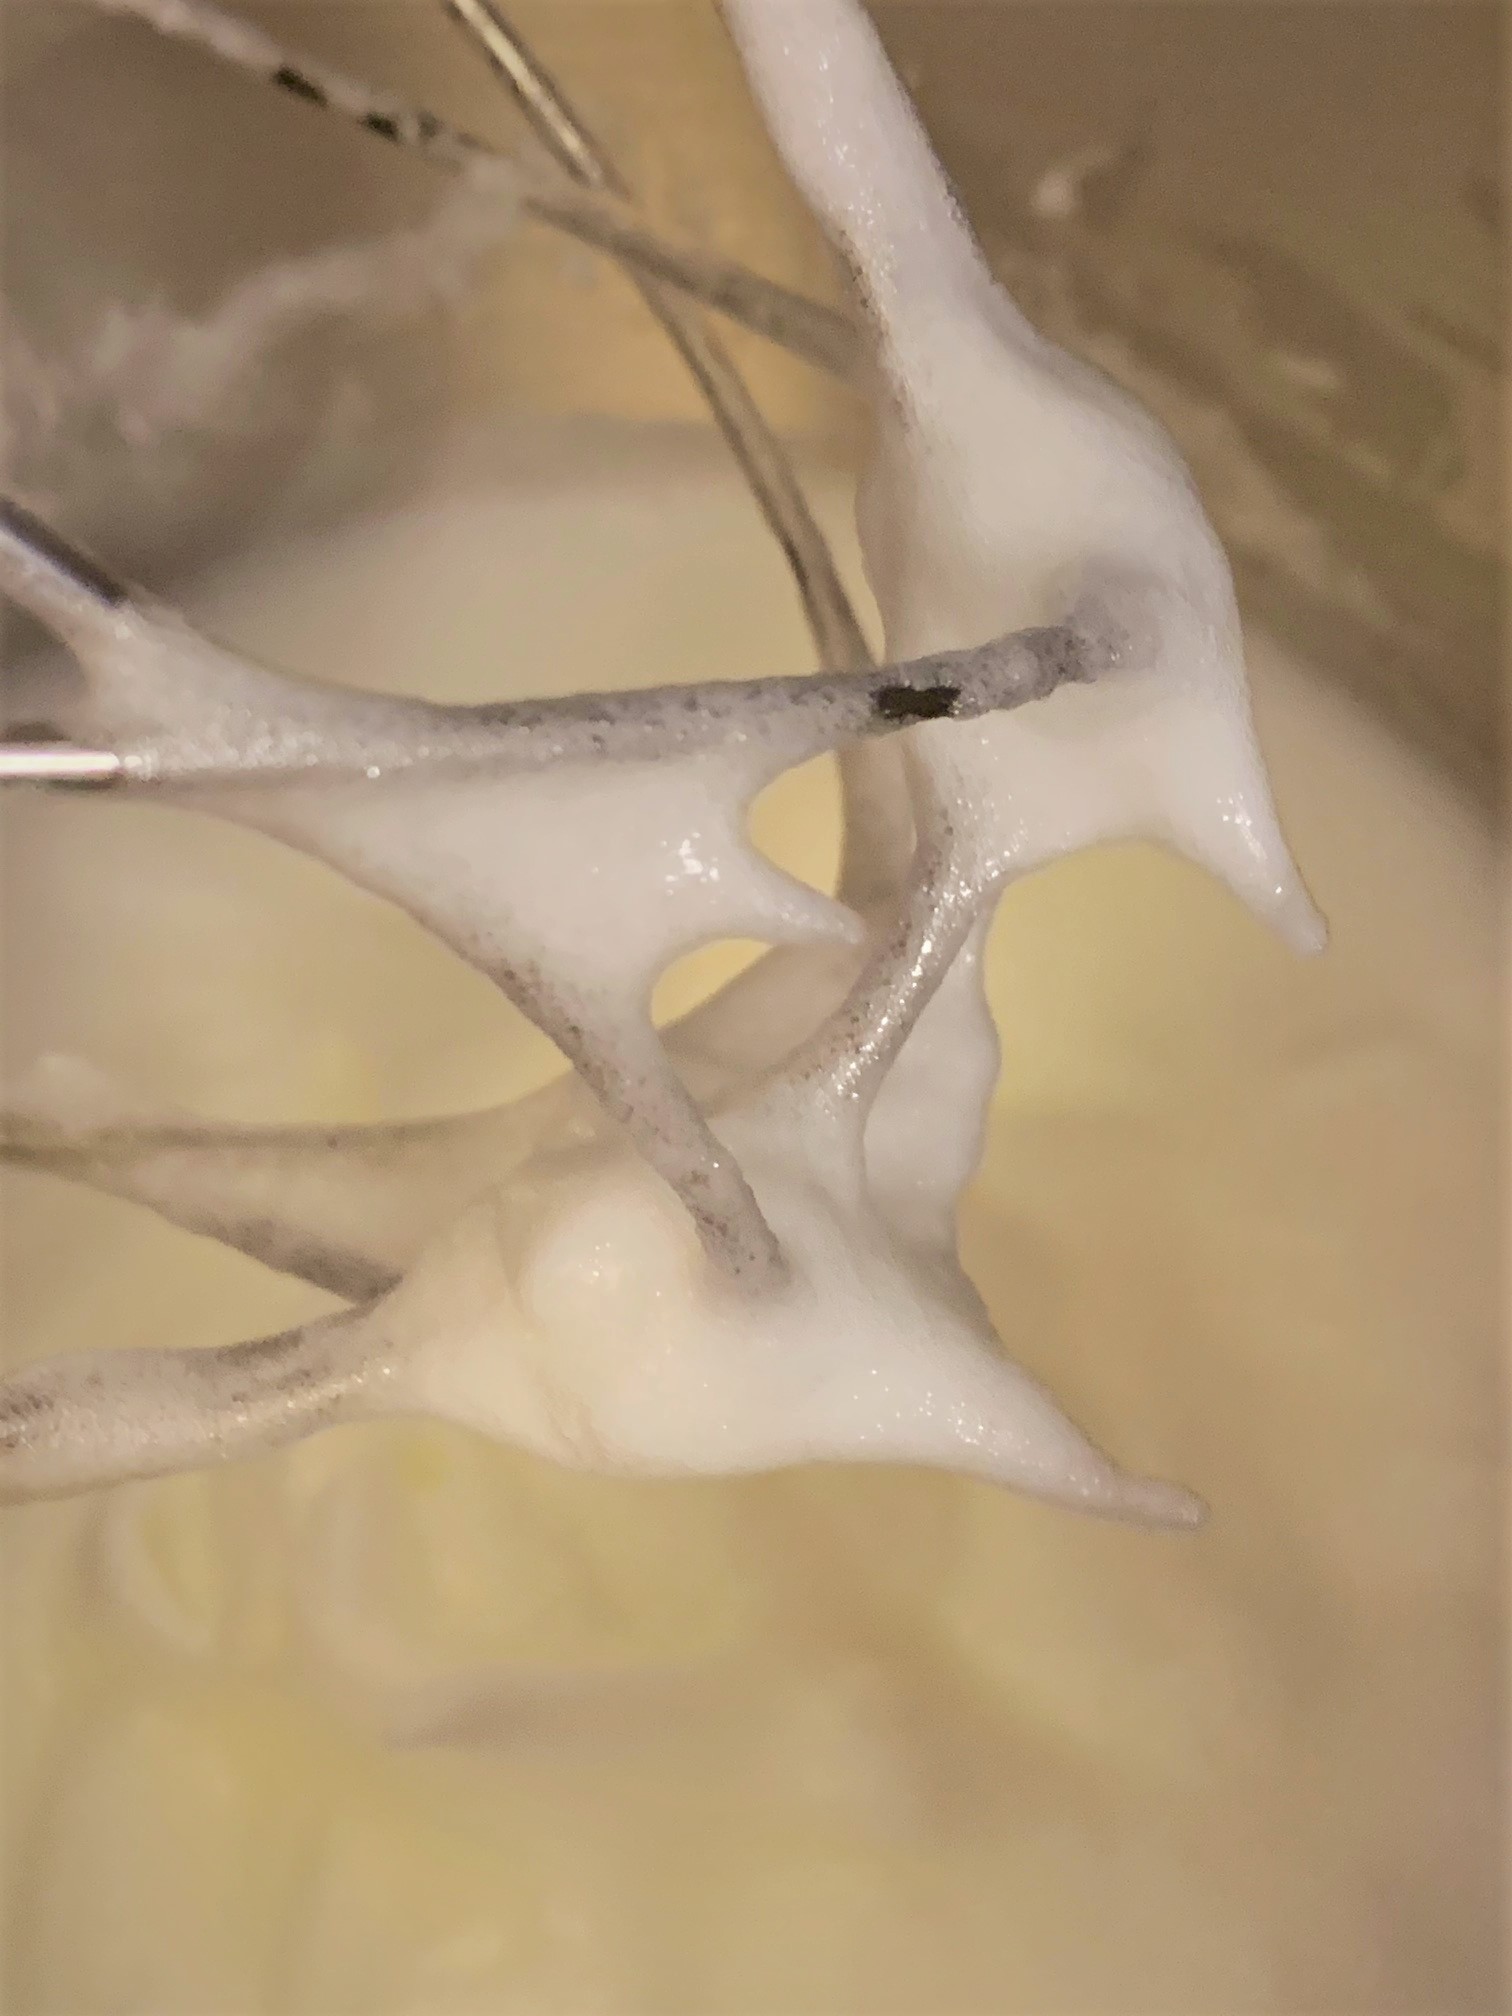
Now it’s time to give our Pumpkin Mickey Waffles the element that makes them light and fluffy; the Egg Whites. Using the electric mixer, whip the Egg Whites until they reach a stiff peak. Similar to what you see in the picture above. This should take about 2 minutes.
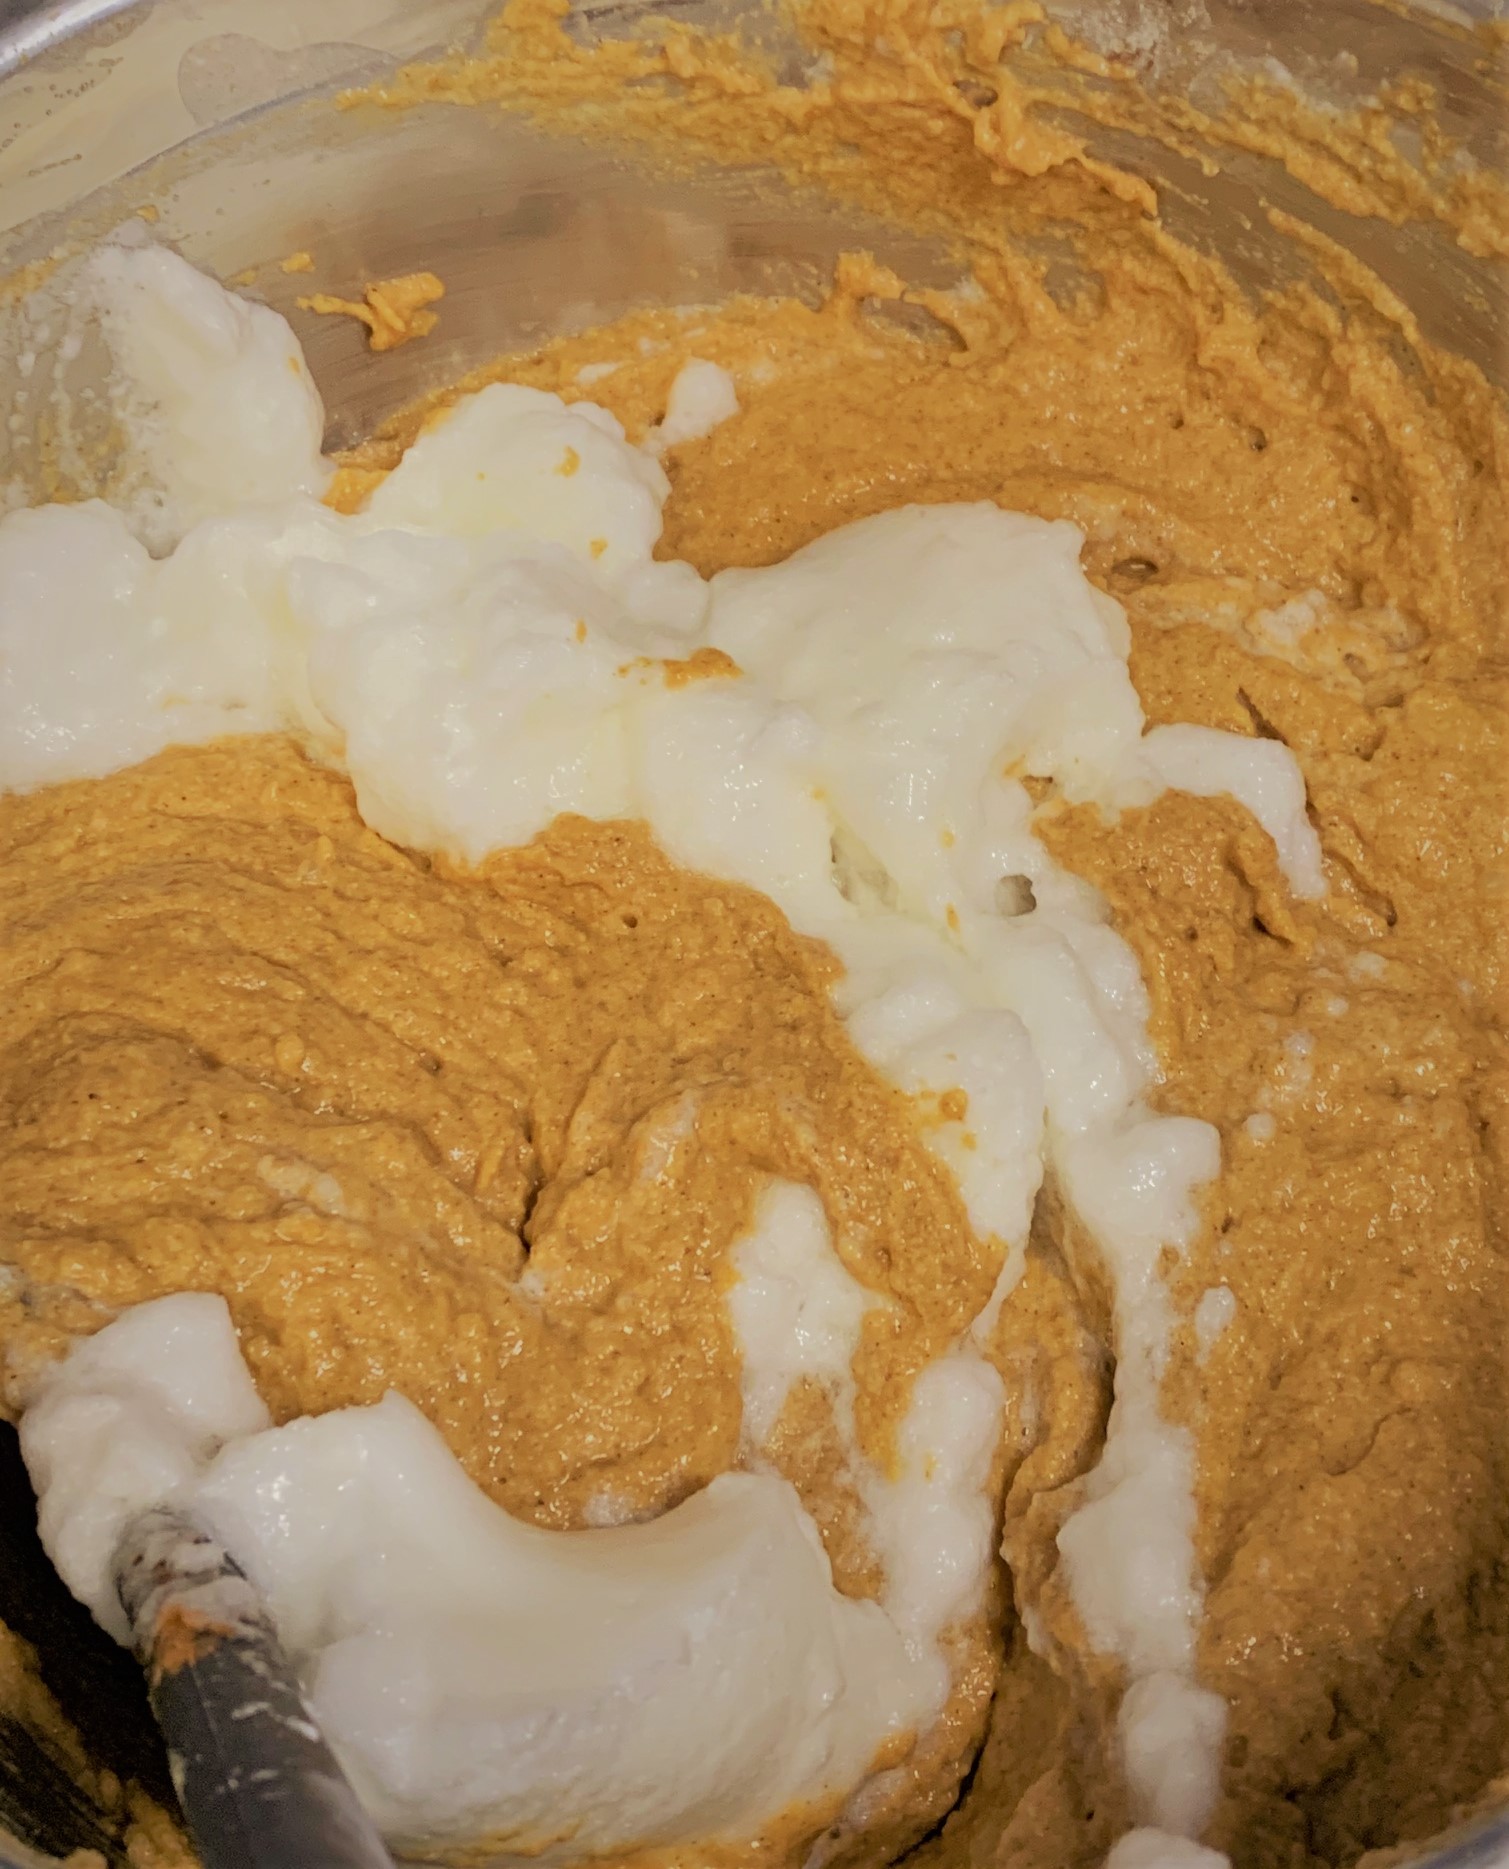
Spoon half of the Whipped Egg Whites into the batter and gently fold them into the mixture. You’ll want to be careful not to “deflate” the egg whites so just fold them together until just combined. Add the remaining Egg Whites and fold them in gently, as well.
Waffle Time!
- If the batter seems a little too thick, you can add a little milk to thin it. Just continue to be careful when combining it so you don’t “deflate” the egg yolks.
Now, we’re ready to cook up our Pumpkin Mickey Waffles. I would suggest doing this while chicken is in the oven if you’re doing this entire recipe.
Follow your waffle iron’s directions to get it preheated then coat with cooking spray. Add the batter as directed (for our Mickey Waffle Maker, we used about ¾ per side) and cook until they reach your desired doneness.
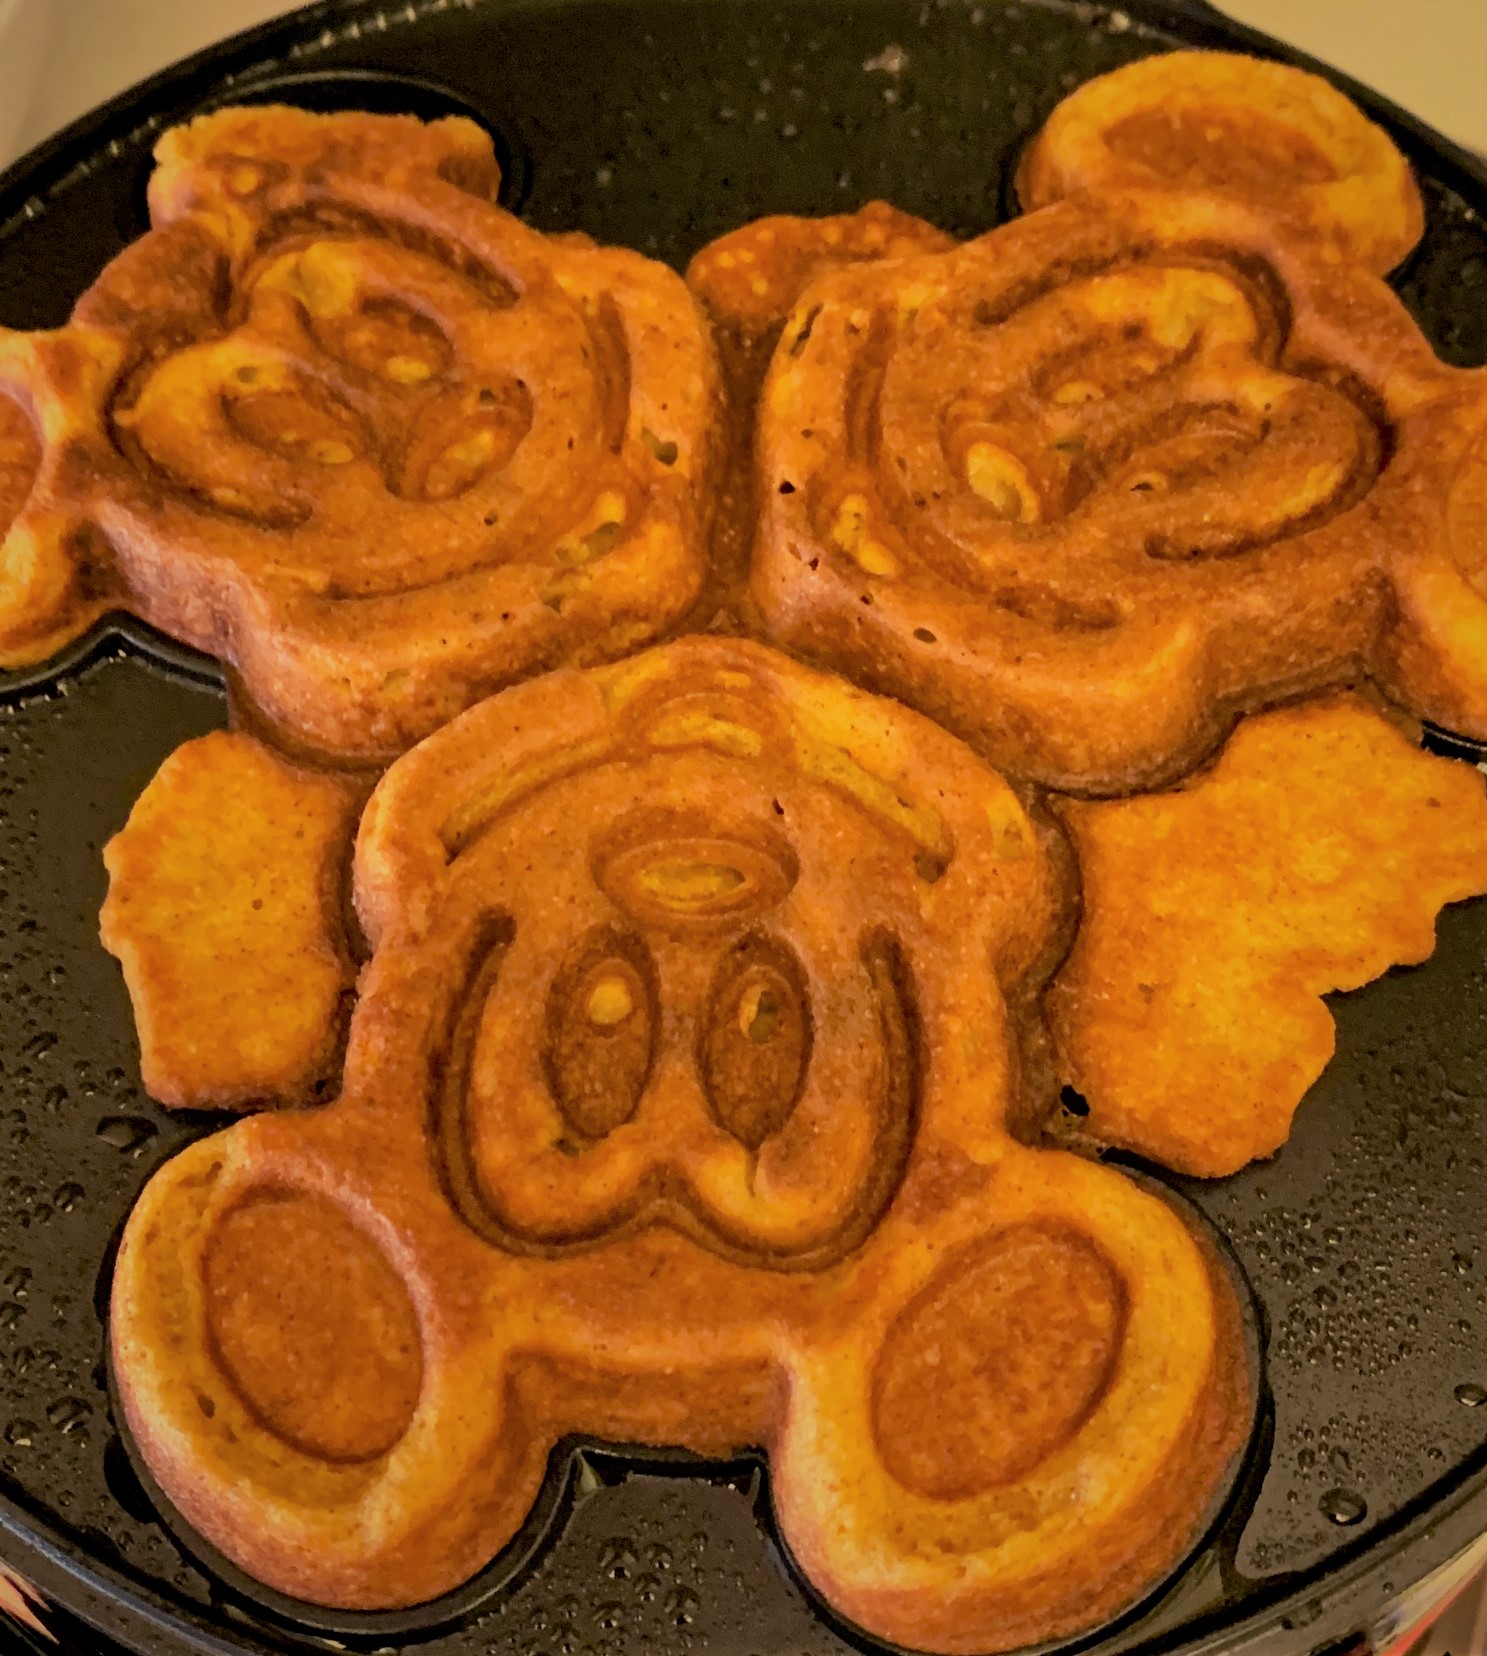
Reserve and keep warm until service.
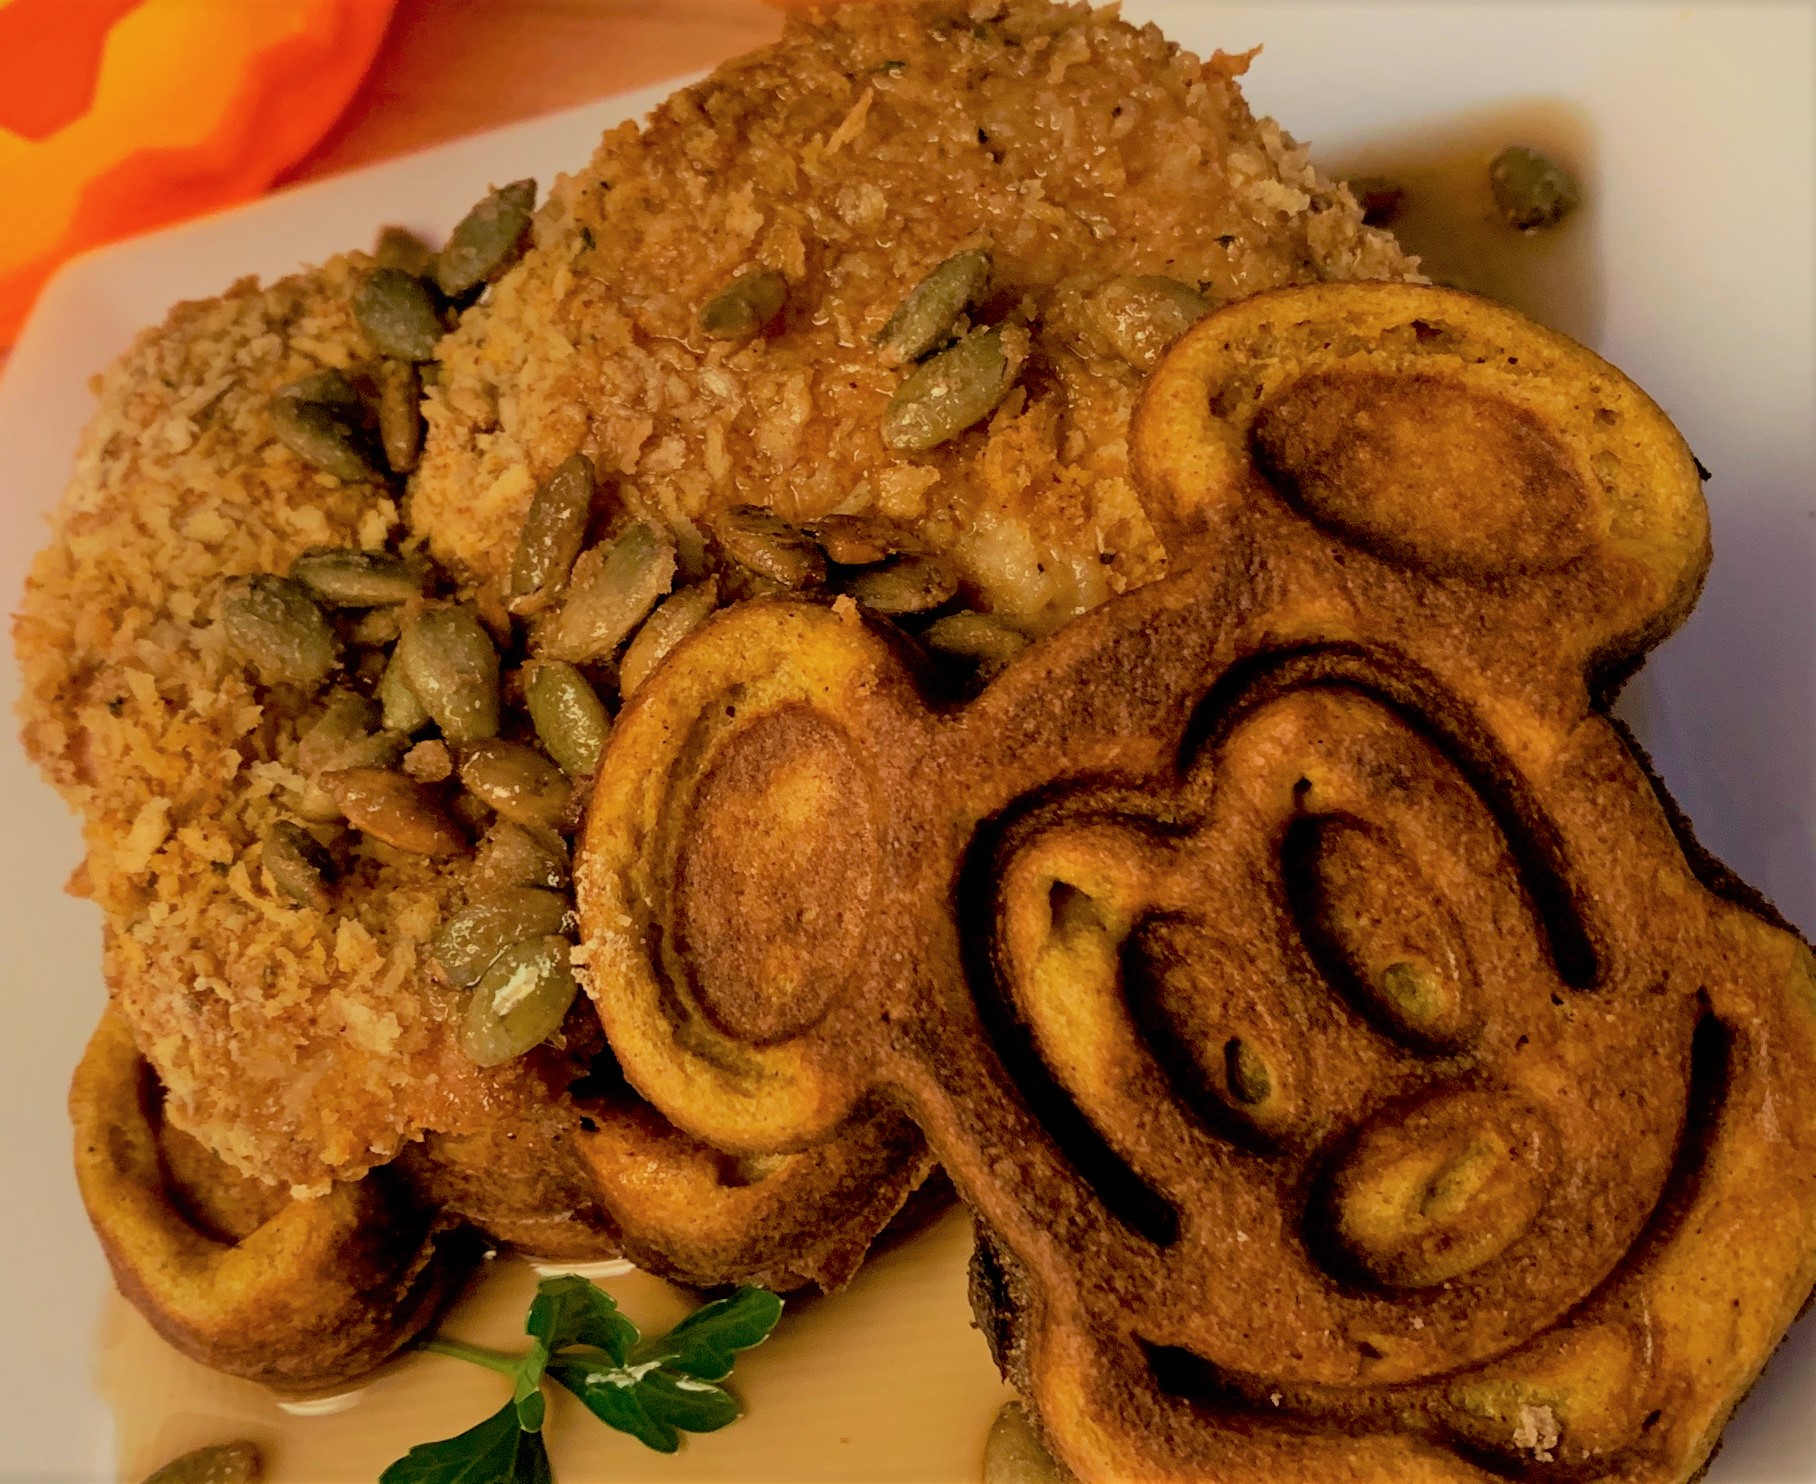
Plating
As I’ve already said, all these elements work well separately but they’re also fantastic together. Here’s how I would suggest plating this dish.
Place 3 Pumpkin Mickey Waffles on the base of the plate of your choice. Top with one or two pieces of the Oven “Fried” Chicken, depending on their size and sprinkle with a handful of the Candied Pumpkin Seeds. Complete with a light drizzle of Pure Maple Syrup and you are ready to go!
Our Conclusion
These Pumpkin Mickey Waffles with Oven “Fried” Chicken and Candied Pumpkin Seeds are a near perfect combination of sweet and savory. The waffles are crisp on the outside and fluffy on the inside. They also have that beautiful richness from the pumpkin along with it’s spice.
Meanwhile the Oven “Fried” Chicken is crispy yet juicy with a nice savory, spiciness. They carry just the right amount of heat to balance the sweetness from the waffles and the Maple Syrup drizzle.
Finally, the Candied Pumpkin Seeds bring one more level of flavor and texture to the dish. They’re sweet and meaty and add, yet another, crunchy texture change. They also have a lovely hint of spice from the cayenne.
Put them all together and they make an absolutely beautiful Pumpkin Spice Season Disney Dish!
If you have any questions about this or any of our recipes, just hit us up below in the comments. You can also reach us through our Contact Us page or through email.
Pumpkin Mickey Waffles with Oven “Fried” Chicken and Candied Pumpkin Seeds
Makes approximately 18 Mickey Waffles – 6 Chicken Thighs – 1 Cup of Pumpkin Seeds
For the Candied Pumpkin Seeds
- 1 cup – Pumpkin Seeds – Shelled
- 2 tbls – Pure Maple Syrup
- 2 tbls – Light Brown Sugar – Packed
- ¼ tsp – Salt
- Pinch – Cayenne Pepper
For the Oven “Fried” Chicken
- 6 – Boneless, Skinless Chicken Thighs (or whatever cut you prefer)
- 2 cups – All-Purpose Flour – Divided into ½ cup & 1½ cups
- 1 cup – Panko Bread Crumbs
- 1½ tbls – Chili Powder
- ½ tbls – Granulated Garlic
- ½ tbls – Granulated Onion
- 2 tsp – Smoked Paprika
- ½ tsp – Cayenne Pepper
- 1 tsp – Kosher or Sea Salt
- ½ tsp – Freshly Ground Pepper
- 2 – Eggs
- 1 tsp – Water
For the Pumpkin Mickey Waffles
- 2 – Eggs – Separated
- 1 cup – Pumpkin Purée
- 1 cup – Milk
- 4 tbls – Unsalted Butter – Melted
- ¼ cup – Light Brown Sugar – Packed
- 3 tbls – Cornstarch
- 1¼ cup – All-Purpose Flour
- 1½ tsp – Baking Powder
- ½ tsp – Salt
- 2 tsp – Cinnamon
- 1 tsp – Ground Ginger
- ½ tsp – Ground Nutmeg
For the Candied Pumpkin Seeds
- Preheat the oven to 375ºF and oil a baking sheet
- Add the Pure Maple Syrup, Light Brown Sugar, Salt and Cayenne Pepper to a pan over medium heat and stir to combine
- Continue to heat, stirring regularly, until the sugar melts and the mixture begins to foam
- Add the Pumpkin Seeds and stir until completely coated
- Spread the coated Pumpkin Seeds evenly on the baking pan and roast in a 375ºF oven for 5 minutes
- Stir and return to the oven to roast for another 5 minutes
- Cool completely and store in an air-tight container for up to 7 days
For the Oven “Fried” Chicken
- Preheat the oven to 400ºF and place a piece of parchment paper on a baking sheet
- Add the Panko Bread Crumbs, ½ cup of the All-Purpose Flour, Chili Powder, Granulated Garlic, Granulated Onion, Smoked Paprika, Cayenne Pepper, Salt and Pepper to a medium-sized, shallow bowl and stir until well combined
- Place the Eggs and Water plus Salt & Pepper to a second shallow bowl and beat to combine
- Add the remaining 1½ cups of All-Purpose Flour plus Salt & Pepper to a third shallow bowl and stir to combine
- Season the Boneless, Skinless Chicken Thighs with Salt & Pepper and coat by dipping into the Flour Mixture, then the Egg Mixture and, finally, the Bread Crumb Mixture. Place on the parchment covered baking sheet
- Spray liberally with Cooking Spray then roast in a 400ºF oven for approximately 30 minutes or until the outside is golden-brown and a thermometer inserted in the center reads 165ºF
- Let rest for approximately 5 minutes and serve warm
For the Pumpkin Mickey Waffles
- Preheat your Mickey Waffle Maker (or whatever Waffle Iron you prefer) according to the unit’s instructions
- Separate the Eggs, placing the Whites into the bowl of an electric mixer and the Yolks in a different medium-sized bowl
- Add the Pumpkin Purée, Milk and Melted Butter to the Egg Yolks and stir until well combined
- Place the Light Brown Sugar and Cornstarch in a large bowl and combine. Add the All-Purpose Flour, Baking Soda, Cinnamon, Ground Ginger, Ground Nutmeg and Salt and stir to combine
- Add the Pumpkin – Egg Yolk Mixture to the Flour Mixture and stir until well combined
- Whip the Egg Whites using an electric mixer until if forms stiff peaks
- Add half of the Whipped Egg Whites to the Waffle Batter and gently fold in until combined. Add the other half and repeat the folding process
- Coat the Waffle Maker with Cooking Spray and ladle the desired amount of batter on to the cooking surface. (I used about ¾ cup for my Mickey Waffles)
- Cook according to the Waffle Maker’s directions until the Pumpkin Mickey Waffles reach your desired amount of doneness
- Reserve and serve warm
To Plate
- Place 2 – 3 Pumpkin Mickey Waffles (depending on size) on your desired serving plate
- Place 1 – 2 pieces of Oven “Fried” Chicken on top of the waffles
- Top with a sprinkling of Candied Pumpkin Seeds and a drizzle of Pure Maple Syrup and serve warm
Be sure to check out our other Disney Dishes
Jolly Holiday Bakery Café’s Pumpkin Muffins
Pumpkin Soup from Sunshine Seasons
The Pumpkin Cheesecake from Disney Cruise Line
Pumpkin Beignets from Café Orleans
Cousin Megan’s Traditional Meatloaf
Croissant Doughnuts from Epcot
Avocado Margarita from La Cava del Tequila
Enchanted Cauli-Flower Sandwich from Red Rose Taverne
Wild Mushroom Risotto from Palo
Cheeseburger Pods from Satu’li Canteen
Lobster Nachos from Lamplight Lounge
Cocoa Brownies with Browned Butter
S.E.A. Shu Mai from Jungle Navigation Company LTD Skipper Canteen
Hoisin Sticky Spare Ribs from Morimoto Asia